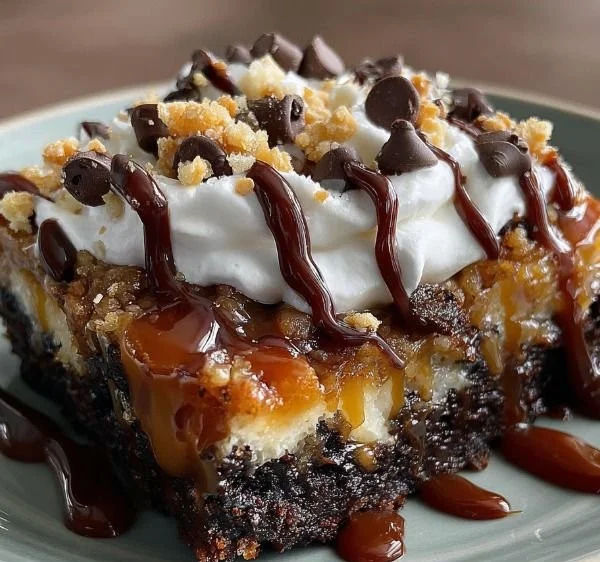
There’s a magic that happens in the kitchen when you combine simple ingredients to create something truly extraordinary. I still remember the first time I tasted Better Than Anything Bars at a friend’s potluck. As I took that first bite, my taste buds were greeted with layers of rich chocolate cake, sweetened condensed milk, and a luscious caramel drizzle. It was love at first bite! With each mouthful, I felt transported back to those carefree days of childhood, where desserts were a celebration and every sweet moment was savored. Today, I want to share this delightful recipe that promises to be a show-stopper at your next gathering or simply a sweet treat for you to enjoy at home.
## Recipe Timing
- Prep Duration: 15 minutes
- Active Cooking: 35 minutes
- Total Duration: 2 hours 50 minutes (includes chilling time)
- Portion Size: 12 servings
- Complexity: Simple
## Nutritional Recipe
- Calories per portion: 360
- Protein: 4g
- Carbs: 54g
- Fats: 14g
- Fiber: 1g
- Sugars: 39g
- Sodium: 350mg
## Why You’ll Love This Better Than Anything Bars
These bars are more than just a dessert; they are an experience. Perfectly fudgy, topped with creamy whipped topping, and covered with a delightful mix of toffee bits and chocolate chips, each bite is a glorious blend of flavors. They are incredibly easy to make and can be prepared well in advance, making them the ideal choice for busy schedules or last-minute dessert needs. Plus, who doesn’t love a dessert that combines chocolate, caramel, and toffee? Trust me, your friends and family will be raving about them long after the last bite!
## The Complete Cooking Journey
Let’s embark on this delightful journey where we create Better Than Anything Bars from scratch! With simple steps and ingredients you probably already have in your pantry, you’ll be amazed at how rewarding baking can be.
## Ingredients:
- 1 box of chocolate cake mix
- 1/2 cup of vegetable oil
- 3 large eggs
- 1 cup of water
- 1 can (14 ounces) sweetened condensed milk
- 1 cup of caramel sauce (store-bought or homemade)
- 1 cup of semi-sweet chocolate chips
- 1 cup of whipped topping (like Cool Whip)
- 1/2 cup of toffee bits (such as Heath Bar bits)
- Optional: chocolate syrup for drizzle
## Method:
### Step 1: Preheat and Prep your Baking Dish
Preheat your oven to 350°F (175°C). Grease and flour a 9×13-inch baking dish or line it with parchment paper for easy removal.
### Step 2: Mix the Cake Batter
In a large mixing bowl, combine the chocolate cake mix, vegetable oil, eggs, and water. Mix thoroughly until you have a smooth batter.
### Step 3: Pour and Spread the Batter
Pour the batter into the prepared baking dish. Use a spatula to evenly spread the batter for consistent baking.
### Step 4: Bake
Bake in the preheated oven for 30-35 minutes, or until a toothpick inserted into the center comes out clean. Allow the cake to cool in the pan for about 10 minutes.
### Step 5: Poke Holes
While the cake is still warm, poke holes all over the surface using a fork. Make sure to poke deep enough so the toppings can seep in.
### Step 6: Add Sweetened Condensed Milk
Pour the sweetened condensed milk evenly over the cake, ensuring it fills the holes generously.
### Step 7: Drizzle with Caramel
Then, drizzle the caramel sauce over the cake in a similar manner to cover every inch of flavor.
### Step 8: Sprinkle on Toppings
Sprinkle the semi-sweet chocolate chips evenly on top, followed by the toffee bits for that irresistible crunch.
### Step 9: Cool Completely
Allow the cake to cool completely in the baking dish. This will help the toppings set beautifully.
### Step 10: Spread the Whipped Topping
Once cooled, spread the whipped topping over the entire surface of the cake for a luscious finish.
### Step 11: Drizzle for Presentation
For added flair, you can drizzle chocolate syrup over the whipped topping if desired.
### Step 12: Chill
Cover and refrigerate the bars for at least 2 hours to allow the flavors to meld together and the texture to adapt.
### Step 13: Cut and Serve
Cut into squares and serve chilled. Enjoy your delicious Better Than Anything Bars!
## Serving Suggestions & Pairings
These delightful bars can be served as is or with a scoop of vanilla ice cream on the side for an extra indulgence. Pair them with a warm cup of coffee or a glass of cold milk for a classic touch. They’re also perfect for potlucks, birthday parties, or just a cozy night in!
## Storage & Leftovers Guide
You can store any leftovers in an airtight container in the refrigerator for up to 5 days. If you want to keep them longer, consider freezing them. Just wrap individual bars in plastic wrap and aluminum foil, and they’ll be good in the freezer for up to 3 months.
## Kitchen Wisdom & Success Tips
- Ensure your cake is completely cool before adding the whipped topping to prevent it from melting.
- For a fun twist, add some crushed nuts or sprinkle more toffee bits on top of the whipped topping.
- If you’re in a hurry, utilize store-bought caramel sauce for ease and speed.
## Flavor Variations & Adaptations
Feel free to get creative! You can swap out the chocolate cake mix for a vanilla or red velvet mix for different flavor experiences. If you want to add a fruity twist, consider drizzling some strawberry or raspberry sauce alongside the chocolate.
## Reader Questions & Solutions
- Q: Can I use a different type of cake mix?
- A: Absolutely! A vanilla or spice cake mix can change the flavor profile beautifully.
- Q: Is there a way to make this recipe gluten-free?
- A: Yes! Use a gluten-free chocolate cake mix and make sure the other toppings are also gluten-free certified.
- Q: What if I don’t have sweetened condensed milk?
- A: You can substitute it with a homemade version by simmering regular milk with sugar until it thickens.
- Q: How do I make homemade caramel sauce?
- A: Combine sugar and water on the stove until it caramelizes to a golden color, then stir in cream and butter for creamy goodness.
- Q: Can I make these bars ahead of time?
- A: Definitely! They can be made a day in advance and stored in the fridge ready for your event.
## Wrapping Up
Better Than Anything Bars are a symphony of flavors and a celebration of simple ingredients coming together to create something wonderful. I encourage you to give this recipe a try; it’s not just about the destination, but the journey of creating something delectable. Whether you share them with family and friends or enjoy them all to yourself, these bars are sure to elicit smiles and satisfaction. Happy baking!