
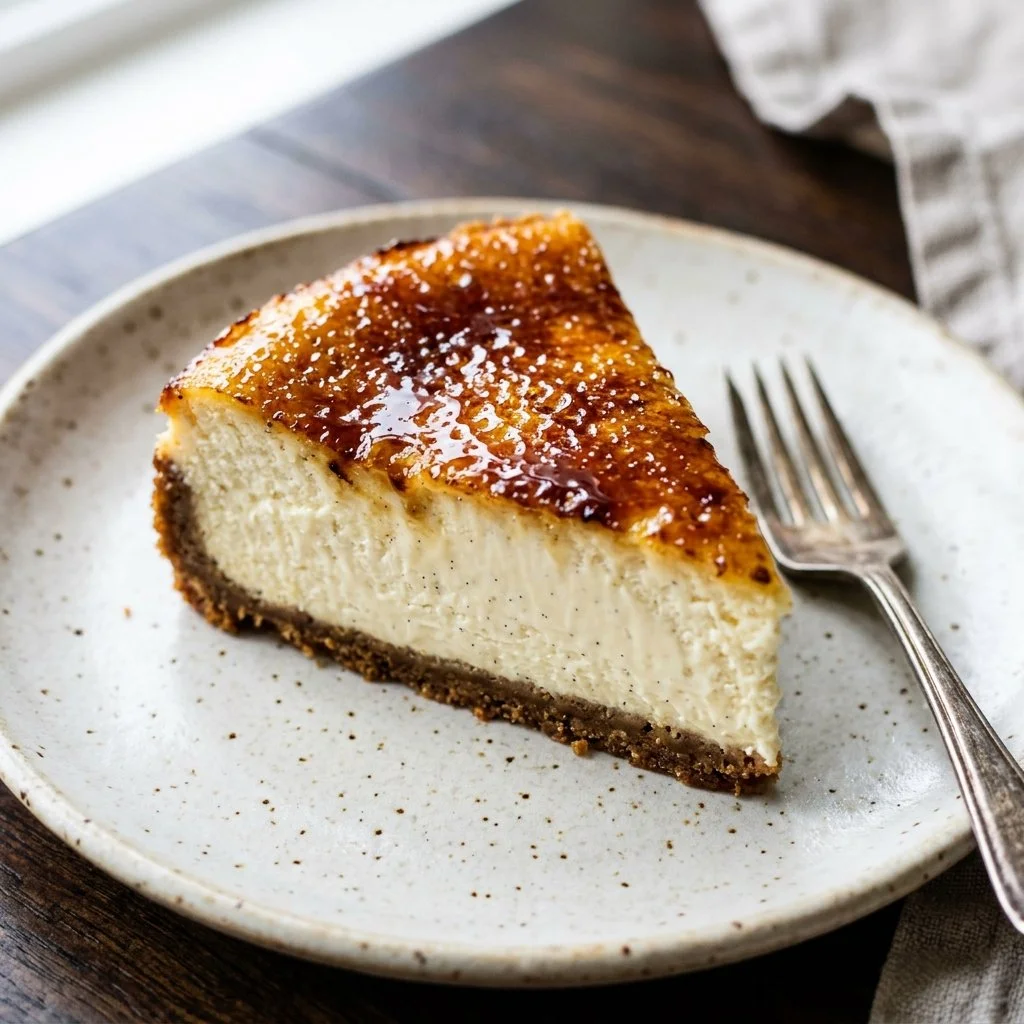
There’s something undeniably magical about the combination of creamy cheesecake and the crackling sweetness of caramelized sugar—a true dessert love story. Imagine the moment you dive into a slice of Crème Brûlée Cheesecake, where the crispy, caramel top gives way to a velvety filling that dances on your taste buds. It’s a treat that feels special, yet creating it at home feels like a personal triumph. I remember the first time I made this luscious dessert, inspired by one of my favorite French restaurants. The aroma filled my kitchen, and each step felt like a little piece of artistry unfolding.
Recipe Timing
- Prep Duration: 30 minutes
- Active Cooking: 50-60 minutes (plus chilling time)
- Total Duration: Approximately 5 hours (including cooling and chilling)
- Portion Size: Serves 10-12
- Complexity: Moderate
Nutritional Recipe
- Calories per portion: ~400
- Protein: 7 grams
- Carbs: 30 grams
- Fats: 30 grams
- Fiber: 0 grams
- Sugars: 25 grams
- Sodium: 260 mg
Why You’ll Love This Crème Brûlée Cheesecake
What makes this Crème Brûlée Cheesecake irresistible? It’s the perfect marriage of two classic desserts—the rich creaminess of cheesecake meeting the sophisticated elegance of crème brûlée. When you take that first bite, the crunch of the caramelized sugar contrasts with the smooth, creamy filling beneath. Every forkful offers a luxurious experience that transports you—it’s a celebration of flavors and textures that feels indulgent yet balanced. Plus, it’s versatile enough for any occasion—from fancy dinner parties to cozy family gatherings. This cheesecake will undoubtedly become a star on your dessert table.
The Complete Cooking Journey
The cooking journey of this cheesecake begins with the grounding notes of crushed graham crackers mingling with melted butter to form a crust that serves as the foundation. As you mix the cream cheese and sugar, you’ll watch as it transforms into a silky batter, invoking feelings of nostalgia and warmth. Each egg added to the mix embodies the sweetness of a homemade dish, culminating in a creamy delight poised to surprise your guests. The final act of caramelizing the sugar on top creates the delightful contrast, making the experience all the more memorable. There’s an incredible sense of accomplishment when you serve this dessert, knowing you’ve crafted something truly special.
Ingredients:
- 2 cups graham cracker crumbs
- 1/2 cup unsalted butter, melted
- 1 cup granulated sugar
- 4 (8-ounce) packages cream cheese, softened
- 1 teaspoon vanilla extract
- 1 teaspoon almond extract
- 4 large eggs
- 1 cup heavy cream
- 1/4 cup brown sugar (for topping)
Method:
Step 1: Preheat and Prepare
Preheat the oven to 325°F (160°C). Grease a 9-inch springform pan, ensuring you’re ready for the magic to happen.
Step 2: Create the Crust
In a bowl, mix the graham cracker crumbs and melted butter until well combined. Press the mixture firmly into the bottom of the prepared pan, creating a solid foundation for your cheesecake.
Step 3: Beat the Cream Cheese Mixture
In a large mixing bowl, beat the cream cheese and granulated sugar until the mixture is smooth and creamy. Add in the vanilla and almond extract, blending them into the equation for added depth.
Step 4: Add the Eggs
Incorporate the eggs one at a time, ensuring each is fully blended before adding the next. This will give your cheesecake that characteristic richness. Pour in the heavy cream and mix until the batter is luxuriously smooth.
Step 5: Pour the Batter
Carefully pour the cheesecake batter over the crust, smoothing the top with a spatula to ensure it bakes evenly.
Step 6: Bake to Perfection
Bake for 50-60 minutes, or until the center is set but still slightly jiggly. This will ensure a creamy texture rather than a dry one.
Step 7: Cool Gradually
Turn off the oven, crack the door open, and let the cheesecake cool in the oven for 1 hour. This gentle cooling process prevents cracking on the surface.
Step 8: Chill for Success
Chill the cheesecake in the refrigerator for at least 4 hours, or overnight if you can wait! This allows the flavors to meld beautifully.
Step 9: Caramelize the Sugar
Before serving, sprinkle the brown sugar evenly over the top. Use a kitchen torch to caramelize the sugar until it turns golden and crispy, creating that signature brûlée finish.
Step 10: Serve and Enjoy!
Serve chilled and relish in the delight of having crafted this stunning Crème Brûlée Cheesecake that promises to impress.
Serving Suggestions & Pairings
This cheesecake deserves to shine on its own, but why not elevate it? Serve it with fresh berries for a vibrant contrast, or drizzle it with a raspberry coulis for brightness. A dollop of whipped cream is always a welcome companion. For a drink pairing, consider a sweet dessert wine or a rich coffee to complement the flavors.
Storage & Leftovers Guide
This cheesecake can be stored in the refrigerator for up to 5 days. If you have leftovers (if you’re lucky!), be sure to cover it with plastic wrap or transfer it to an airtight container to keep it fresh. However, avoid caramelizing the sugar until you’re ready to serve; doing so will maintain that coveted crunch.
Kitchen Wisdom & Success Tips
- Ensure your cream cheese is softened prior to mixing; this creates a lump-free filling.
- Don’t rush the cooling process in the oven; it’s crucial for preventing cracks.
- For perfectly caramelized sugar, hold your kitchen torch a few inches above the surface and move it slowly to ensure even browning.
Flavor Variations & Adaptations
Feel free to personalize this cheesecake! Swap out the almond extract for orange or coconut for a different flavor profile. Add chocolate chips into the batter for a rich treat, or fold in fruit puree to introduce a swirl of flavor.
Reader Questions & Solutions
-
Q: Why is my cheesecake cracking?
A: Cracks often occur due to rapid temperature changes. Always cool your cheesecake gradually! -
Q: Can I use low-fat cream cheese?
A: Yes, but the texture may differ slightly; it might not be as rich and creamy. -
Q: How do I prevent the bottom crust from becoming soggy?
A: Pre-bake the crust for 10 minutes before adding the filling; this can help activate the crust. -
Q: Can I make this a day ahead?
A: Absolutely! Cheesecake often tastes better the next day as it allows the flavors to meld. -
Q: What can I serve with it?
Fresh fruits, chocolate sauce, or a side of ice cream all pair beautifully alongside this cheesecake.
Wrapping Up
Whether it’s a dessert to mark a special occasion or a sweet treat to enjoy after a long day, this Crème Brûlée Cheesecake is sure to bring joy to your table. With its creamy texture, contrasting crunch, and rich flavors, it invites you to indulge and savor each moment. So gather your ingredients, ignite your passion for baking, and transform your kitchen into a haven of deliciousness. Trust me, your taste buds will thank you!