
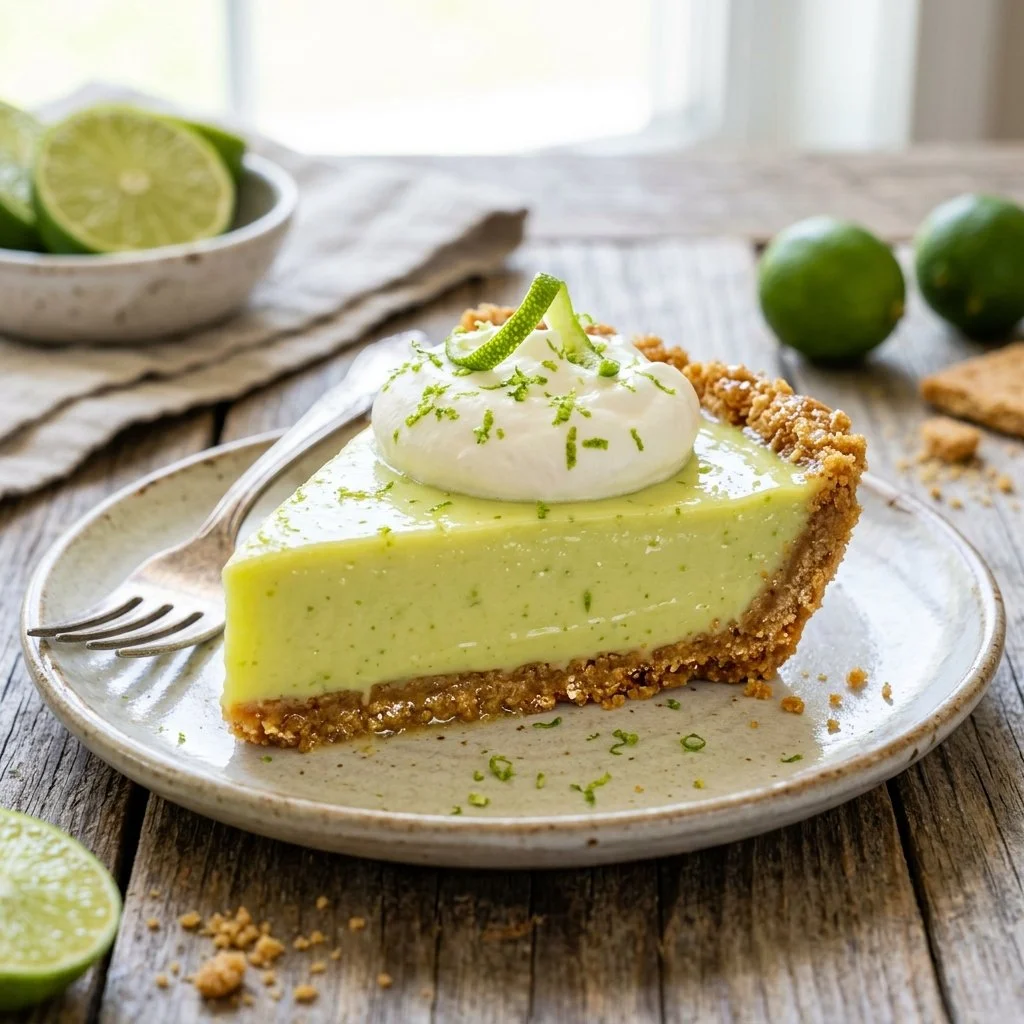
The sun was setting over the horizon, casting a golden hue across the kitchen as I pulled a perfectly chilled Classic Key Lime Pie from the refrigerator. The creamy, tangy filling contrasted beautifully with the crisp, buttery graham cracker crust, and I could hardly wait to dig in. This pie wasn’t just a dessert; it was a slice of nostalgia, evoking memories of lazy summers spent on the coast, where the only worry was how quickly I could get to the next piece. As I sliced into the pie, the aroma of fresh limes filled the air, harmonizing with the comforting scent of baked graham cracker. It was time to bring that sunshine into your kitchen!
Recipe Timing
- Prep Duration: 20 minutes
- Active Cooking: 30 minutes
- Total Duration: 3 hours 50 minutes (includes cooling and chilling time)
- Portion Size: Serves 8
- Complexity: Simple
Nutritional Recipe
- Calories per portion: 350
- Protein: 4g
- Carbs: 32g
- Fats: 22g
- Fiber: 1g
- Sugars: 20g
- Sodium: 150mg
Why You’ll Love This Classic Key Lime Pie
There’s a certain charm about Key Lime Pie that speaks to the essence of summer. It’s a dessert that perfectly balances tartness and sweetness, with a light and airy texture that melts in your mouth. Every bite evokes warmth and happiness, making it a perfect treat for gatherings, celebrations, or simply as a refreshing finale to a meal. Not only is it incredibly simple to make, but it also transports you to a tropical paradise with every forkful. Truly, it’s a piece of sunshine on a plate!
The Complete Cooking Journey
Making a Classic Key Lime Pie takes only a handful of steps, but each stage is filled with delightful anticipation. From mixing the graham cracker crust to whipping up the velvety filling, this dessert proves how easy and delicious homemade treats can be. Let’s dive into the journey of crafting this iconic pie!
Ingredients:
- 1 ½ cups graham cracker crumbs
- ½ cup unsalted butter, melted
- 1 cup granulated sugar
- 4 large egg yolks
- 1 can (14 ounces) sweetened condensed milk
- ½ cup fresh key lime juice
- 1 tablespoon lime zest
- 1 cup heavy cream (for topping)
- 2 tablespoons powdered sugar (for topping)
- Lime wedges or slices (for garnish)
Method:
Step 1: Preheat the Oven
Preheat the oven to 350°F (175°C), setting the stage for a perfect bake.
Step 2: Create the Crust
In a mixing bowl, combine graham cracker crumbs and melted butter until well blended. Press this mixture into the bottom and up the sides of a pie dish. Bake for 8-10 minutes until golden brown, filling your kitchen with a warm, inviting scent.
Step 3: Whisk the Filling
In another bowl, whisk together the granulated sugar and egg yolks until smooth. It should be creamy and well combined.
Step 4: Combine Ingredients
Stir in the sweetened condensed milk, key lime juice, and lime zest until fully combined. The mixture should look luscious and fragrant!
Step 5: Pour & Bake Again
Pour the lime filling into the cooled crust and bake for another 10 minutes. Your pie is coming together magnificently!
Step 6: Cool Down
Remove from the oven and allow to cool to room temperature. This is the hardest part—waiting for it to perfectly chill in the refrigerator for at least 3 hours. Patience pays off!
Step 7: Whip the Cream
Before serving, whip the heavy cream with powdered sugar until soft peaks form. This will be the cloud-like topping that completes your pie!
Step 8: Garnish & Serve
Spread or pipe the whipped cream over the pie and garnish with lime wedges or slices. Serve cold and watch as everyone’s eyes light up with delight!
Serving Suggestions & Pairings
This Key Lime Pie is a star on its own, but it pairs wonderfully with a dollop of whipped cream or a scoop of vanilla ice cream. For drinks, consider serving it alongside sweet tea, a refreshing mint lemonade, or even a chilled glass of sparkling wine. Its citrus notes can perfectly complement seafood dishes or a light summer salad.
Storage & Leftovers Guide
Cover any leftovers with plastic wrap or aluminum foil. The pie can be stored in the refrigerator for up to 3 days. For longer storage, you can freeze the pie (without toppings) for up to 2 months. Just remember to thaw it overnight in the fridge before serving!
Kitchen Wisdom & Success Tips
- Key Limes vs. Regular Limes: Authentic Key Lime Pie uses key limes, which are smaller and more flavorful than regular limes. If unavailable, Persian limes can be used in a pinch.
- Room Temperature Eggs: For a smoother filling, use room temperature eggs.
- Chill the Pie: Be patient and let the pie chill thoroughly; it will enhance the flavor and texture.
Flavor Variations & Adaptations
Feeling creative? Try adding coconut for a tropical twist or even a hint of vanilla to the whipped cream for added depth. For a fun presentation, you might experiment with blending other citrus flavors, like blood orange or grapefruit.
Reader Questions & Solutions
-
Can I use store-bought crust?
Absolutely! While homemade is wonderful, a store-bought graham cracker crust can save you time and still taste great. -
How can I tell when my pie is set?
The pie should have just a slight jiggle in the center when you take it out of the oven. It will continue to set as it cools. -
What if I don’t have key lime juice?
Fresh lime juice will work fine; however, your pie will be a bit more tart. -
Can I make a gluten-free version?
Sure! Use gluten-free graham crackers for the crust, and you’ll have a delicious gluten-free treat. -
Why is my whipped cream not thickening?
Make sure your bowl and beaters are cold, and don’t overwhip, or you may end up with butter!
Wrapping Up
Creating this Classic Key Lime Pie is about more than just following a recipe—it’s about capturing the essence of summer and the joy of sharing something delicious with loved ones. Whether you’re enjoying a slice on a warm day or serving it at a family gathering, each bite will remind you that sometimes the simplest recipes are the most beloved. So roll up your sleeves, grab those key limes, and let the baking begin! Cheers to your culinary adventure!
PrintClassic Key Lime Pie
A refreshing and creamy Key Lime Pie that captures the essence of summer with its perfect balance of tartness and sweetness.
- Prep Time: 20 minutes
- Cook Time: 30 minutes
- Total Time: 230 minutes
- Yield: 8 servings 1x
- Category: Dessert
- Method: Baking
- Cuisine: American
- Diet: Vegetarian
Ingredients
- 1 ½ cups graham cracker crumbs
- ½ cup unsalted butter, melted
- 1 cup granulated sugar
- 4 large egg yolks
- 1 can (14 ounces) sweetened condensed milk
- ½ cup fresh key lime juice
- 1 tablespoon lime zest
- 1 cup heavy cream (for topping)
- 2 tablespoons powdered sugar (for topping)
- Lime wedges or slices (for garnish)
Instructions
- Preheat the oven to 350°F (175°C).
- Create the crust by combining graham cracker crumbs and melted butter in a mixing bowl. Press into a pie dish and bake for 8-10 minutes.
- Whisk together the granulated sugar and egg yolks until smooth.
- Stir in the sweetened condensed milk, key lime juice, and lime zest until fully combined.
- Pour the lime filling into the cooled crust and bake for another 10 minutes.
- Cool to room temperature, then refrigerate for at least 3 hours.
- Whip the heavy cream with powdered sugar until soft peaks form.
- Spread or pipe the whipped cream over the pie and garnish with lime wedges or slices. Serve cold.
Notes
For a gluten-free version, use gluten-free graham crackers for the crust. Allow the pie to chill thoroughly for best flavor and texture.
Nutrition
- Serving Size: 1 slice
- Calories: 350
- Sugar: 20g
- Sodium: 150mg
- Fat: 22g
- Saturated Fat: 13g
- Unsaturated Fat: 9g
- Trans Fat: 0g
- Carbohydrates: 32g
- Fiber: 1g
- Protein: 4g
- Cholesterol: 60mg