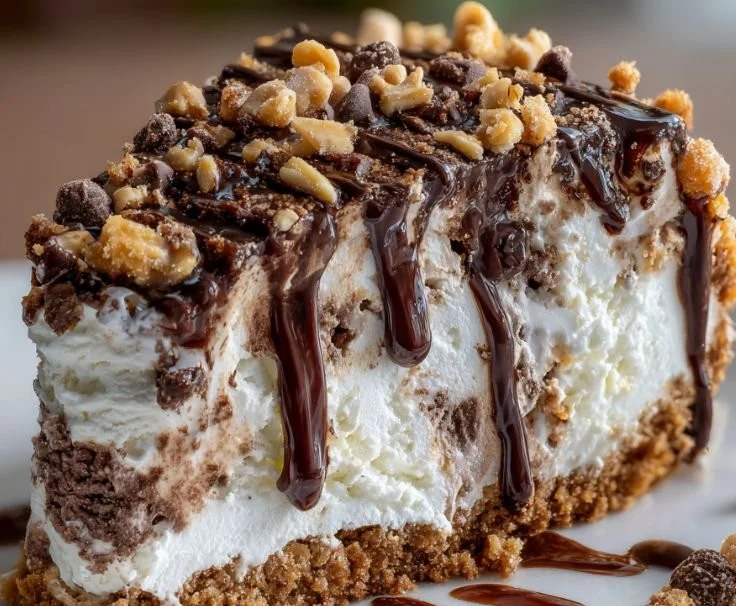
There’s something so nostalgic about biting into a Drumstick ice cream cone on a hot summer day. The combination of creamy ice cream, crunchy bits, and that rich chocolatey dip always hits the spot. And it’s this very memory that inspired me to create a delightful dessert: the Drumstick Ice Cream Cake. Trust me, this isn’t just any cake; it’s a creamy, crunchy, irresistible delight that brings the joy of those ice cream cones right to your table.
Picture this: a buttery chocolate crust that crumbles perfectly, a soft, velvety layer of vanilla ice cream swirled with luscious chocolate fudge, and a topping of crunchy nuts and chocolate chips. It’s everything you love about a drumstick, updated into a memorable cake that you can share with family and friends, or simply indulge in on a cozy night in.
## Recipe Timing
- Prep Duration: 20 minutes
- Active Cooking: 10 minutes
- Total Duration: 4 hours 30 minutes (includes freezing time)
- Portion Size: Serves 10-12
- Complexity: Simple
## Nutritional Recipe
- Calories per portion: 325
- Protein: 5 g
- Carbs: 31 g
- Fats: 20 g
- Fiber: 1 g
- Sugars: 16 g
- Sodium: 210 mg
## Why You’ll Love This Drumstick Ice Cream Cake: Creamy, Crunchy, Irresistible Delight!
This Drumstick Ice Cream Cake is a fantastic treat for anyone who loves the classic ice cream cone. It’s rich yet refreshing, striking the perfect balance between creamy and crunchy. Imagine the sweet, buttery crust giving way to a velvety ice cream layer, complemented by the decadent flavors of chocolate and crunchy nuts. It’s the kind of dessert that not only satisfies your sweet tooth but also evokes warm memories of summer days spent enjoying ice cream treats. Whether you’re celebrating a birthday, hosting a summer gathering, or simply want to treat your family, this cake will surely be the star of the dessert table!
## The Complete Cooking Journey
Let’s embark on this delightful cooking adventure together. Prepare for some simple yet fun steps that will lead you to a luscious cake that looks as good as it tastes!
## Ingredients:
Crust:
- 1 ½ cups chocolate cookie crumbs
- ½ cup unsalted butter, melted
Ice Cream Layer:
- 4 cups vanilla ice cream, softened
- 1 cup chocolate fudge sauce
Topping:
- 1 cup chopped nuts (peanuts or almonds)
- ½ cup chocolate chips
## Method:
### Step 1: Preheat Your Oven
Preheat your oven to 350°F (175°C).
### Step 2: Combine Crust Ingredients
In a mixing bowl, combine chocolate cookie crumbs and melted butter until well mixed.
### Step 3: Press the Crust Mixture
Press the mixture firmly into the bottom of a 9-inch springform pan to form the crust.
### Step 4: Bake the Crust
Bake the crust for 10 minutes, then remove and let it cool completely.
### Step 5: Spread the Ice Cream
Spread the softened vanilla ice cream evenly over the cooled crust.
### Step 6: Add Chocolate Fudge
Drizzle the chocolate fudge sauce over the ice cream, then swirl it gently with a knife for a marbled effect.
### Step 7: Top with Crunch
Sprinkle the chopped nuts and chocolate chips evenly on top.
### Step 8: Freeze the Cake
Cover the cake with plastic wrap and freeze for at least 4 hours or until firm.
### Step 9: Let it Rest
Before serving, let the cake sit at room temperature for 10 minutes for easier slicing.
## Serving Suggestions & Pairings
This cake is perfect on its own, but if you want to elevate it further, consider serving it alongside a drizzle of extra chocolate fudge or a scoop of additional vanilla ice cream. For a refreshing contrast, pair it with some fresh berries. A light whipped cream or a sprinkle of sea salt can also enhance the flavors beautifully.
## Storage & Leftovers Guide
Leftovers? If you have any (which is unlikely!), store the cake in the freezer, covered tightly with plastic wrap or aluminum foil to prevent freezer burn. It will keep well for about a week. Just remember to let it sit out for a few minutes at room temperature before slicing again.
## Kitchen Wisdom & Success Tips
- Soften Ice Cream Naturally: Leave your ice cream out for 10-15 minutes to soften before spreading, making the layering process much easier.
- Perfect Slicing: Use a sharp knife soaked in warm water for cleaner slices. Just remember to wipe it clean after each cut!
- Alternative Nut Options: If you have nut allergies, consider using crushed pretzels or graham cracker crumbs for a similar crunch.
## Flavor Variations & Adaptations
- Different Ice Cream Flavors: While vanilla is classic, experiment with flavors like mint chocolate chip, coffee, or even strawberry!
- Drizzles and Sauces: Try caramel sauce or even a fruit compote for a fruity twist.
## Reader Questions & Solutions
-
Can I make this ahead of time?
Absolutely! This cake can be made a day or two in advance and stored in the freezer until you’re ready to serve. -
What if I don’t have a springform pan?
You can use a regular cake pan, but be sure to line it with parchment paper for easier removal of the cake. -
Can I substitute the chocolate cookie crumbs?
Yes! You can use graham cracker crumbs or any other sweet cookie that you love. -
What do I do if my ice cream won’t soften?
If your ice cream is too hard, use a microwave for 10-second intervals until just soft enough to spread. -
How long does it take to freeze fully?
At least 4 hours, but ideally overnight for the best firmness.
## Wrapping Up
Creating this Drumstick Ice Cream Cake is a wonderful way to cherish those childhood memories while enjoying a delicious treat. Whether you’re treating yourself or making it for loved ones, this cake is bound to bring smiles and satisfaction. Don’t let the opportunity to create such a delightful dessert pass you by— grab your ingredients and let the fun begin! Happy baking!
PrintDrumstick Ice Cream Cake
A creamy, crunchy dessert that captures the nostalgia of classic Drumstick ice cream cones, featuring a buttery chocolate crust, vanilla ice cream, and a topping of nuts and chocolate chips.
- Prep Time: 20 minutes
- Cook Time: 10 minutes
- Total Time: 270 minutes
- Yield: 10-12 servings 1x
- Category: Dessert
- Method: Freezing
- Cuisine: American
- Diet: Vegetarian
Ingredients
- 1 ½ cups chocolate cookie crumbs
- ½ cup unsalted butter, melted
- 4 cups vanilla ice cream, softened
- 1 cup chocolate fudge sauce
- 1 cup chopped nuts (peanuts or almonds)
- ½ cup chocolate chips
Instructions
- Preheat your oven to 350°F (175°C).
- Combine chocolate cookie crumbs and melted butter in a mixing bowl until well mixed.
- Press the mixture firmly into the bottom of a 9-inch springform pan to form the crust.
- Bake the crust for 10 minutes, then remove and let it cool completely.
- Spread the softened vanilla ice cream evenly over the cooled crust.
- Drizzle the chocolate fudge sauce over the ice cream and swirl it gently with a knife for a marbled effect.
- Sprinkle the chopped nuts and chocolate chips evenly on top.
- Cover the cake with plastic wrap and freeze for at least 4 hours or until firm.
- Let the cake sit at room temperature for 10 minutes before serving for easier slicing.
Notes
Store leftovers tightly covered in the freezer for up to a week. Let sit for a few minutes at room temperature before slicing again.
Nutrition
- Serving Size: 1 slice
- Calories: 325
- Sugar: 16g
- Sodium: 210mg
- Fat: 20g
- Saturated Fat: 10g
- Unsaturated Fat: 8g
- Trans Fat: 0g
- Carbohydrates: 31g
- Fiber: 1g
- Protein: 5g
- Cholesterol: 20mg