
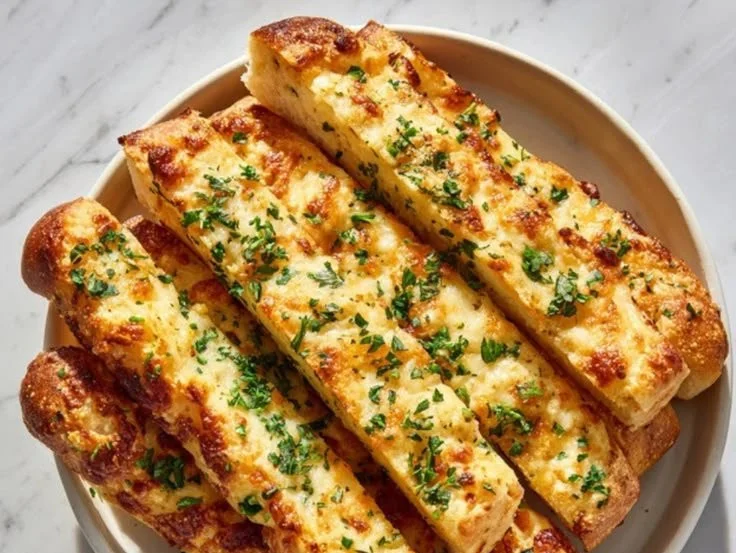
I’ve always had a soft spot for warm, freshly baked bread, and even more so when it’s garlic bread—an absolute classic! But as someone who’s embraced a low-carb lifestyle, I often find myself reminiscing about those golden, crusty breadsticks that once accompanied every pasta dish. Then comes a moment of revelation when I discover the glorious world of Keto-friendly cooking! With a handful of simple ingredients, these Keto Garlic Breadsticks bring back the nostalgia without the guilt. They’re crunchy, cheesy, and bursting with flavor, making them the perfect side for any meal or even an indulgent snack on their own!
Recipe Timing
- Prep Duration: 10 minutes
- Active Cooking: 15 minutes
- Total Duration: 25 minutes
- Portion Size: 8 breadsticks
- Complexity: Simple
Nutritional Recipe
- Calories per portion: Approximately 150
- Protein: 8 grams
- Carbs: 3 grams
- Fats: 13 grams
- Fiber: 1 gram
- Sugars: 1 gram
- Sodium: 250 mg
Why You’ll Love This Keto Garlic Breadsticks
These Keto Garlic Breadsticks are not only a delicious way to satisfy your carb cravings without the guilt, but they also offer a rich, cheesy, and buttery flavor that will have everyone asking for seconds. The combination of mozzarella cheese and almond flour makes for a surprisingly stretchy, dough-like base that holds up perfectly to dipping. Plus, they’re super easy to prepare! Whether you’re hosting a gathering or just enjoying a quiet night in, these breadsticks make every meal feel special.
The Complete Cooking Journey
Embarking on this culinary journey is just a microwave away! Let’s dive into the wonderful process of creating these scrumptious garlic breadsticks that will soon become a staple in your home.
Ingredients:
- 2 cups shredded mozzarella cheese
- 3/4 cup almond flour
- 2 oz cream cheese
- 1 large egg
- 2 tsp garlic powder
- 1 tsp Italian seasoning
- Fresh parsley for garnish
- Melted butter for brushing
Method:
Step 1: Preheat the Oven
Preheat your oven to 425°F (220°C) and line a baking sheet with parchment paper. Getting your oven nice and hot ensures those breadsticks come out crispy and golden!
Step 2: Melt the Cheeses
In a microwave-safe bowl, combine the shredded mozzarella cheese and cream cheese. Microwave for 60-90 seconds, stirring halfway through, until completely melted and smooth. This cheesy mixture will form the heart of your breadsticks!
Step 3: Combine Ingredients
Add the almond flour, egg, garlic powder, and Italian seasoning to the melted cheese mixture. Stir vigorously until a cohesive dough forms. If the mixture cools and becomes difficult to work with, microwave for another 15-20 seconds to warm it up again.
Step 4: Shape the Dough
Place the dough on the prepared baking sheet. Using your hands or a rolling pin, spread and flatten the dough into a rectangle about 1/2 inch thick.
Step 5: Cut the Breadsticks
Use a pizza cutter or knife to cut the dough into 8 equal breadstick strips. This is where it starts to look like real garlic bread!
Step 6: Brush with Butter
Brush the tops of the breadsticks generously with melted butter. This will help them achieve that beautiful golden color and add extra flavor. Who doesn’t love a little extra butter?
Step 7: Bake
Bake for 12-15 minutes, or until the edges are golden brown and crispy. Watch them carefully during the last few minutes to prevent burning; nothing worse than burnt garlic bread!
Step 8: Garnish and Cool
Remove from the oven and immediately sprinkle with fresh chopped parsley. Let cool for 2-3 minutes before serving. Enjoy warm with your favorite dipping sauce!
Serving Suggestions & Pairings
These garlic breadsticks are divine on their own, but pair them with your favorite marinara or Alfredo sauce for an extra delicious dip! Serve them alongside a hearty salad, a bowl of soup, or as a side with grilled meats. They’re versatile enough to complement any dish!
Storage & Leftovers Guide
Store any leftovers in an airtight container in the refrigerator for up to 3 days. Reheat them in the oven or microwave for a quick warm-up. They can also be frozen for up to a month—just thaw and reheat when you’re ready to enjoy!
Kitchen Wisdom & Success Tips
- Make sure your mozzarella is well-shredded for the best melting consistency.
- If you find your dough too sticky, dust your hands with almond flour while shaping.
- Play around with different herbs or spices for unique flavor variations!
Flavor Variations & Adaptations
Want to add a twist? Consider mixing in some shredded Parmesan cheese for added flavor and that nice, cheesy texture. You could also spice things up with a pinch of crushed red pepper flakes for a hint of heat. Feeling adventurous? Add some chopped sun-dried tomatoes or olives to the dough for a Mediterranean flair!
Reader Questions & Solutions
-
Q: Can I use other types of cheese?
A: Absolutely! Cheddar or a blend of cheeses can work well, but they may alter the texture slightly. -
Q: My dough is too crumbly; what should I do?
A: If the dough seems too dry, try adding a bit more cream cheese or a splash of water to combine it better. -
Q: How can I make these dairy-free?
A: Substitute mozzarella with a dairy-free cheese alternative and ensure your cream cheese is also dairy-free. -
Q: Can I bake these in advance?
A: Yes, you can prepare and bake them ahead of time. Just store them in an airtight container and warm them up before serving. -
Q: What if I don’t have almond flour?
A: You can replace almond flour with coconut flour, but use less (about 1/4 cup) since it absorbs more moisture.
Wrapping Up
These Keto Garlic Breadsticks are perfect for anyone craving a savory snack or a delicious addition to their meal. Easy to make and even easier to devour, they’re sure to be a hit, whether you’re on a keto journey or just looking to enjoy a low-carb treat. So gather your ingredients, preheat that oven, and get ready to savor the taste of homemade goodness that not only feeds your body but also warms your heart. Happy cooking!