
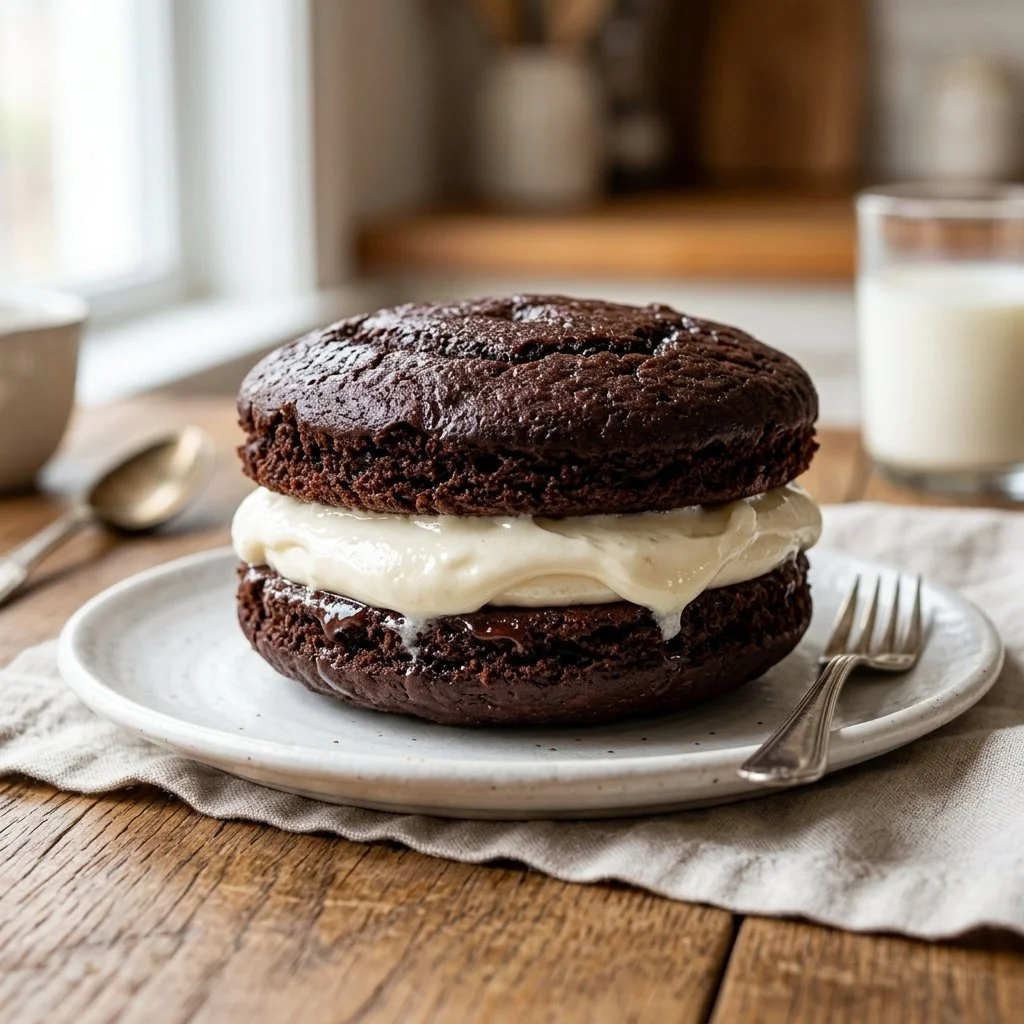
There’s something inherently nostalgic about Whoopie Pies. They transport us back to carefree days, where the biggest worry was whether you could fit another sweet treat in your lunchbox. For me, these delightful chocolatey sandwiches bring back fond memories of my childhood, a time spent in the kitchen with my grandmother, her laughter ringing above the sound of whirring beaters. As we baked together, my small hands would eagerly pile spoonfuls of fluffy filling into soft chocolate cookies, creating the perfect combination of textures.
These Whoopie Pies are not just a dessert; they are a celebration of simplicity and joy. Each bite is a duo of tender, cocoa-laden cakes cradling a luscious marshmallow filling, and I can’t help but smile while reminiscing about those moments. Let’s dive into the details of creating these sweet treasures in your own kitchen!
Recipe Timing
- Prep Duration: 20 minutes
- Active Cooking: 12 minutes
- Total Duration: 32 minutes
- Portion Size: About 24 whoopie pies (12 sandwiches)
- Complexity: Simple
Nutritional Recipe
- Calories per portion: ~250
- Protein: 2g per serving
- Carbs: 38g per serving
- Fats: 10g per serving
- Fiber: 1g per serving
- Sugars: 20g per serving
- Sodium: 180mg per serving
Why You’ll Love This Whoopie Pies
These Whoopie Pies are the epitome of comfort food. With a rich chocolate flavor that envelops your senses and the sweet, cloud-like filling that melts in your mouth, it’s no wonder these treats are adored by many. They’re perfect for sharing at parties, cheerful additions to lunchboxes, or simply as an indulgent pick-me-up at the end of a long day. Plus, they’re easy to make, making them an inviting project for bakers of all skill levels!
The Complete Cooking Journey
Creating Whoopie Pies is not only fun but also incredibly rewarding. You’ll start with the aroma of cocoa powder wafting through your kitchen, leading you into a rhythm of mixing, baking, and assembling. Each step feels like a lively dance where flour flies, and plenty of laughter fills the air as you drop dollops of batter onto the baking sheet. Once baked, the thrill intensifies as you whip up the dreamy filling. The final assembly is a joy in itself, as you sandwich those cookies together, resulting in a treat that’s as delightful to behold as it is to eat.
Ingredients:
-
For the whoopie pies:
- 1 cup unsweetened cocoa powder
- 2 cups all-purpose flour
- 1 teaspoon baking soda
- 1/2 teaspoon baking powder
- 1/2 teaspoon salt
- 1 cup unsalted butter, softened
- 2 cups granulated sugar
- 2 large eggs
- 1 teaspoon vanilla extract
- 1 cup whole milk
-
For the filling:
- 1 cup marshmallow fluff
- 1 cup powdered sugar
- 1/2 cup unsalted butter, softened
- 1 teaspoon vanilla extract
Method:
Step 1: Preheat the Oven
Preheat oven to 350°F (175°C). Warm up that kitchen and get ready for some baking magic!
Step 2: Whisk Together Dry Ingredients
In a bowl, whisk together cocoa powder, flour, baking soda, baking powder, and salt; set aside. This blend will provide the rich base for your Whoopie Pies.
Step 3: Beat Butter and Sugar
In another bowl, beat butter and sugar until light and fluffy. Breathe in that sweet smell as it comes together!
Step 4: Add Eggs and Vanilla
Add eggs and vanilla extract, beating well until fully incorporated. This step ensures that your Whoopie Pies have that lovely depth of flavor.
Step 5: Combine Dry Ingredients and Milk
Gradually add dry ingredients, alternating with milk, mixing until just combined. Remember: don’t overmix! We want tender pies.
Step 6: Shape the Batter
Drop tablespoon-sized amounts of batter onto a baking sheet. Space them a bit apart, as they will spread while baking.
Step 7: Bake to Perfection
Bake for about 10-12 minutes until set. Your kitchen will start to smell like chocolate heaven!
Step 8: Cool Down
Let cool completely on a wire rack. Patience is key, as you don’t want to melt your filling!
Step 9: Make the Filling
For the filling, beat together marshmallow fluff, powdered sugar, butter, and vanilla until smooth. It should be luscious and inviting!
Step 10: Spread the Filling
Spread filling on the flat side of one pie and top with another, creating a perfect sandwich of joy.
Step 11: Enjoy Every Bite!
Sit back, relax, and savor the fruits of your labor. Each bite should be a celebration of chocolate and fluffiness!
Serving Suggestions & Pairings
Whoopie Pies are delightful on their own, but why not elevate your experience? Pair them with a tall glass of cold milk or a steaming cup of coffee for a delightful afternoon treat. Think about serving them at birthday parties, picnics, or even as a whimsical dessert for family dinners.
Storage & Leftovers Guide
These Whoopie Pies can be stored in an airtight container at room temperature for up to 3 days. For extended freshness, place them in the fridge for up to a week. However, I doubt they’ll last that long!
Kitchen Wisdom & Success Tips
- Tip for Fluffy Filling: Make sure your butter is softened but not melted. Room temperature butter creates the light texture that we crave.
- Consistent Sizes: Use a cookie scoop for uniform shapes.
- Chill Before Cutting: If you’re having trouble spreading the filling, chill the pies briefly to firm up.
Flavor Variations & Adaptations
Feeling adventurous? Try adding different flavors to the filling, such as peppermint extract during winter holidays, or a hint of espresso powder in the batter for coffee lovers. You can also experiment with colored marshmallow fluff to celebrate special occasions!
Reader Questions & Solutions
-
Why did my Whoopie Pies spread too much?
- Ensure your butter is softened properly (not melted) and keep the baking sheet spaced to allow for spreading.
-
Can I use a different filling?
- Absolutely! Cream cheese frosting, chocolate ganache, or even fruit preserves can make delightful alternatives.
-
How can I make these gluten-free?
- Substitute the all-purpose flour with a gluten-free blend. Just ensure it contains enough binding agents.
-
What if my filling is too runny?
- If this happens, chill the filling in the fridge for 30 minutes to firm it up before spreading.
-
Can I freeze Whoopie Pies?
- Yes! Freeze them in a single layer, then transfer to an airtight container for up to 3 months. Thaw before serving!
Wrapping Up
Baking Whoopie Pies is not just a culinary task; it’s an experience. Your kitchen will brim with the sweet smells of chocolate and vanilla, and the joy of sharing these soft, fluffy sandwiches with loved ones will create new memories. So grab your apron and gather your ingredients—it’s time to make some Whoopie!
PrintWhoopie Pies

Delightful chocolatey sandwiches filled with a luscious marshmallow filling, bringing back nostalgic memories.
- Prep Time: 20 minutes
- Cook Time: 12 minutes
- Total Time: 32 minutes
- Yield: 12 sandwiches (24 whoopie pies) 1x
- Category: Dessert
- Method: Baking
- Cuisine: American
- Diet: Vegetarian
Ingredients
- 1 cup unsweetened cocoa powder
- 2 cups all-purpose flour
- 1 teaspoon baking soda
- 1/2 teaspoon baking powder
- 1/2 teaspoon salt
- 1 cup unsalted butter, softened
- 2 cups granulated sugar
- 2 large eggs
- 1 teaspoon vanilla extract
- 1 cup whole milk
- 1 cup marshmallow fluff
- 1 cup powdered sugar
- 1/2 cup unsalted butter, softened
- 1 teaspoon vanilla extract
Instructions
- Preheat oven to 350°F (175°C).
- Whisk together cocoa powder, flour, baking soda, baking powder, and salt; set aside.
- Beat butter and sugar until light and fluffy.
- Add eggs and vanilla extract, beating well until fully incorporated.
- Combine dry ingredients and milk, mixing until just combined.
- Drop tablespoon-sized amounts of batter onto a baking sheet.
- Bake for about 10-12 minutes until set.
- Cool on a wire rack.
- For the filling, beat together marshmallow fluff, powdered sugar, butter, and vanilla until smooth.
- Spread filling on the flat side of one pie and top with another.
- Sit back and enjoy!
Notes
Store in an airtight container at room temperature for up to 3 days or in the fridge for up to a week. Freeze for up to 3 months.
Nutrition
- Serving Size: 1 sandwich
- Calories: 250
- Sugar: 20g
- Sodium: 180mg
- Fat: 10g
- Saturated Fat: 6g
- Unsaturated Fat: 4g
- Trans Fat: 0g
- Carbohydrates: 38g
- Fiber: 1g
- Protein: 2g
- Cholesterol: 30mg