
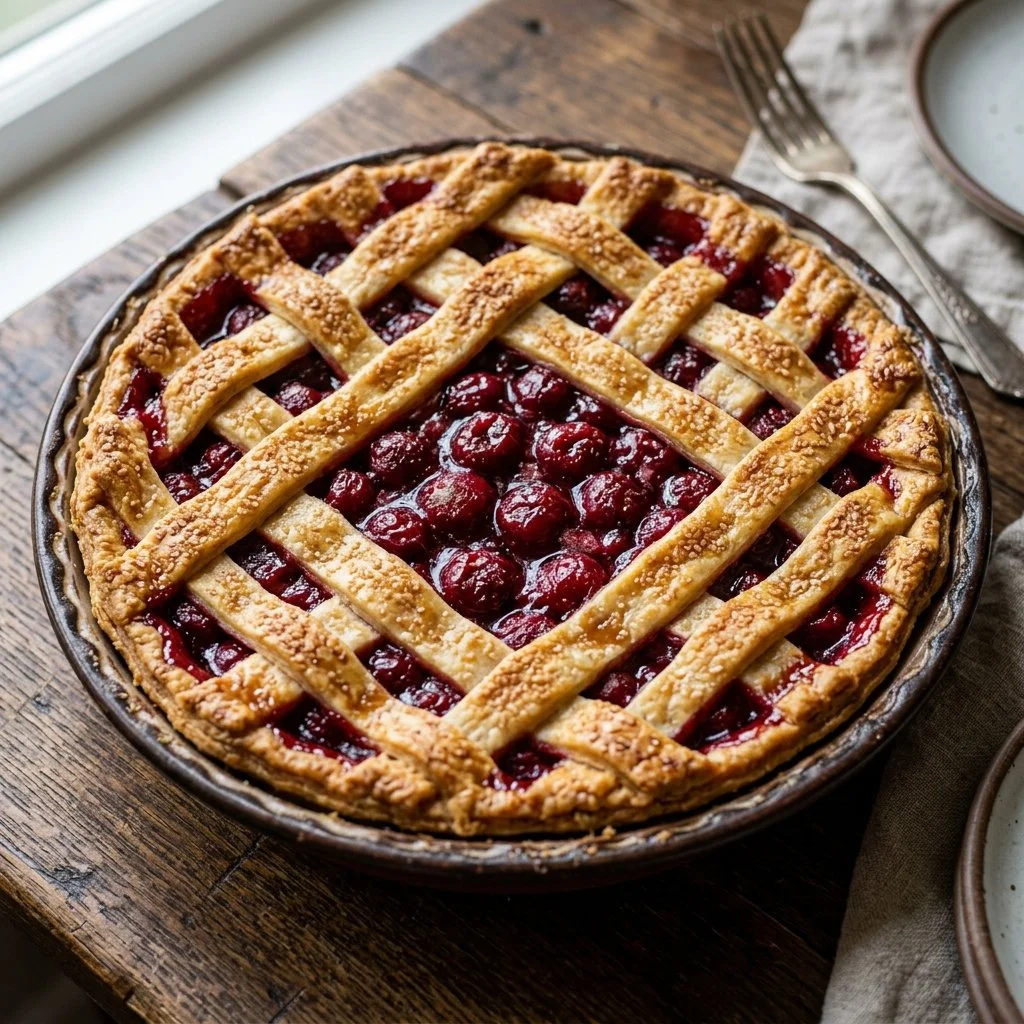
There’s something truly magical about a home-baked cherry pie that evokes a sense of nostalgia. I remember the summers spent at my grandmother’s house, where the sweet aroma of ripe cherries and buttery crust filled the air. We would pick cherries from the orchard, their vibrant red hue glistening in the sunlight. Each cherry would tell a story as we pitted and prepared them for what would become a centerpiece of our family gatherings. Cherry pie wasn’t just a dessert; it was a celebration of the season and our time together. Today, I want to share with you a simple yet delightful cherry pie recipe that can bring those same feelings to your kitchen.
Recipe Timing
- Prep Duration: 15 minutes
- Active Cooking: 35 minutes
- Total Duration: 50 minutes
- Portion Size: 8 servings
- Complexity: Simple
Nutritional Recipe
- Calories per portion: ~250 kcal
- Protein: 2 grams
- Carbs: 38 grams
- Fats: 10 grams
- Fiber: 2 grams
- Sugars: 18 grams
- Sodium: 120 mg
Why You’ll Love This Cherry Pie
This cherry pie is a celebration of simplicity and flavor. With just a handful of ingredients, you can create a dessert that is visually stunning and incredibly tasty. The tartness of the cherries perfectly balances the sweetness from the sugar, while the buttery crust offers a delightful crunch. Whether you’re serving it at a summer barbecue, a holiday feast, or simply enjoying it on a quiet evening, each slice of this pie is a hug in dessert form. Plus, it’s versatile! Serve it warm with a scoop of vanilla ice cream or enjoy it chilled with a dollop of whipped cream.
The Complete Cooking Journey
Let’s embark on this cooking adventure together. With each step, you’ll smell the lovely fragrances filling your home, and once it’s done, the anticipation will make diving into that first slice even sweeter.
Ingredients:
- 2 cups fresh or frozen cherries
- 1 cup granulated sugar
- 2 tablespoons cornstarch
- 1 tablespoon lemon juice
- 1 tablespoon butter
- 1 teaspoon vanilla extract
- 1 pie crust (store-bought or homemade)
- 1 egg (for egg wash)
Method:
Step 1: Preheat the Oven
Preheat the oven to 425°F (220°C). This high temperature will help create a beautifully crisp crust.
Step 2: Prepare the Cherry Filling
In a large bowl, combine the cherries, sugar, cornstarch, lemon juice, and vanilla extract. Stir gently but thoroughly to ensure the cherries are well coated and the sugar dissolves.
Step 3: Assemble the Pie Crust
Roll out your pie crust and place it in a pie dish. Ensure it fits snugly into the dish without stretching it too much. Pour the luscious cherry mixture into the crust, making sure all those juicy cherries are well spread out.
Step 4: Add Butter for an Extra Kick
Dot the cherry filling with small pieces of butter. This little step will make the pie even richer and more decadent.
Step 5: Cover and Seal the Pie
Take a second pie crust and carefully cover the cherry filling. Crimp the edges to seal in that mouthwatering filling, and don’t forget to cut slits on the top to let steam escape. This is where the pie gets its character!
Step 6: Give a Golden Touch
Brush the top of the pie with beaten egg for a golden, shiny finish. It adds that bakery-style touch to your homemade dessert.
Step 7: Bake to Perfection
Put the pie in the preheated oven and bake for 30-35 minutes. You’ll know it’s ready when the crust is golden brown and the filling is bubbly. Your kitchen will smell amazing!
Step 8: Cool and Serve
Once baked, let the pie cool for at least 15 minutes before slicing. This cooling period allows the filling to set up, making it easier to serve.
Serving Suggestions & Pairings
Cherry pie is delicious on its own, but consider pairing it with vanilla ice cream, whipped cream, or a tart yogurt for a delightful contrast. You can also serve it with a hot cup of coffee or a refreshing glass of lemonade to balance the flavors beautifully.
Storage & Leftovers Guide
Store any leftover pie in the refrigerator, tightly covered, where it will stay fresh for 3-4 days. For longer storage, consider freezing it. Just wrap it in plastic wrap, followed by aluminum foil, and it can last for up to 2 months in the freezer. Thaw overnight in the fridge before serving.
Kitchen Wisdom & Success Tips
- Use seasonal cherries if you can; they provide the best flavor.
- If using frozen cherries, thaw them beforehand and drain the excess liquid to prevent a soggy crust.
- Don’t skip the lemon juice; it brightens the flavor of the cherries.
- Want a bit of spice? Consider adding a pinch of cinnamon or nutmeg to the cherry filling!
Flavor Variations & Adaptations
Feel free to get creative! Add almond extract instead of vanilla for a nutty flavor. You can also blend cherries with other seasonal fruits like blueberries or peaches for a delightful twist. For a healthier version, use honey or maple syrup instead of granulated sugar.
Reader Questions & Solutions
-
Can I use canned cherries instead?
Yes! Just make sure to drain the syrup well to prevent excess moisture in your pie. -
How do I prevent my pie crust from getting soggy?
Pre-baking the crust for 5-10 minutes before adding the filling can help reduce sogginess. -
Can I make the filling ahead of time?
Absolutely! You can prepare the cherry filling a day in advance. Just store it in the fridge until you’re ready. -
What if I don’t have cornstarch?
You can substitute with equal parts flour, but it may not thicken as well. -
Is there a way to make this pie vegan?
Yes! Use a vegan pie crust and replace the butter with coconut oil or a dairy-free margarine. For the egg wash, use a mixture of plant-based milk and a bit of maple syrup.
Wrapping Up
As you prepare your cherry pie, take a moment to savor the process. The act of baking is an expression of love, patience, and creativity. Remember, every pie tells a story, and each slice is a chance to create new memories. I hope this cherry pie brings as much joy to your kitchen as it has to mine. Happy baking!
Now, roll up your sleeves and gather those ingredients – it’s time to create something delicious!
PrintClassic Cherry Pie
A delightful cherry pie that captures the essence of summers spent with family, featuring a sweet and tart filling baked in a buttery crust.
- Prep Time: 15 minutes
- Cook Time: 35 minutes
- Total Time: 50 minutes
- Yield: 8 servings 1x
- Category: Dessert
- Method: Baking
- Cuisine: American
- Diet: Vegetarian
Ingredients
- 2 cups fresh or frozen cherries
- 1 cup granulated sugar
- 2 tablespoons cornstarch
- 1 tablespoon lemon juice
- 1 tablespoon butter
- 1 teaspoon vanilla extract
- 1 pie crust (store-bought or homemade)
- 1 egg (for egg wash)
Instructions
- Preheat the oven to 425°F (220°C).
- Combine the cherries, sugar, cornstarch, lemon juice, and vanilla extract in a large bowl.
- Roll out your pie crust and place it in a pie dish.
- Dot the cherry filling with small pieces of butter.
- Cover the filling with a second pie crust and crimp the edges to seal.
- Brush the top of the pie with beaten egg.
- Bake for 30-35 minutes until the crust is golden brown and the filling is bubbly.
- Cool for at least 15 minutes before slicing.
Notes
Serve warm with vanilla ice cream or chilled with whipped cream. Store leftovers tightly covered in the refrigerator for 3-4 days or freeze for up to 2 months.
Nutrition
- Serving Size: 1 slice
- Calories: 250
- Sugar: 18g
- Sodium: 120mg
- Fat: 10g
- Saturated Fat: 3g
- Unsaturated Fat: 4g
- Trans Fat: 0g
- Carbohydrates: 38g
- Fiber: 2g
- Protein: 2g
- Cholesterol: 62mg