When I think of decadent dessert experiences, my mind inevitably wanders to Boston Cream Pie. This humble yet sophisticated dessert has long held a special place in my heart (and stomach). Its two soft layers of vanilla cake, luscious pastry cream, and rich chocolate glaze create a quintessential taste of bliss. But what if we took that beloved classic and transformed it into a show-stopping cheesecake? Enter the Boston Cream Pie Cheesecake—a delightful blend of creamy cheesecake and rich chocolate that brings together the best of both worlds.
As we embark on this culinary adventure, I can’t help but feel a wave of nostalgia. I remember the first time I attempted to recreate the flavors of Boston Cream Pie. My kitchen was filled with the sweet aroma of vanilla and chocolate swirling in the air, beckoning friends and family to gather around the table for a taste of something extraordinary. Today, I invite you to do the same—to whip up this delicious cheesecake that will surely become a staple at your gatherings.
Recipe Timing
- Prep Duration: 20 minutes
- Active Cooking: 60 minutes
- Total Duration: 6 hours (including chill time)
- Portion Size: Serves 10
- Complexity: Moderate
Nutritional Recipe
- Calories per portion: 450
- Protein: 7g
- Carbs: 34g
- Fats: 33g
- Fiber: 1g
- Sugars: 20g
- Sodium: 350mg
Why You’ll Love This Boston Cream Pie Cheesecake
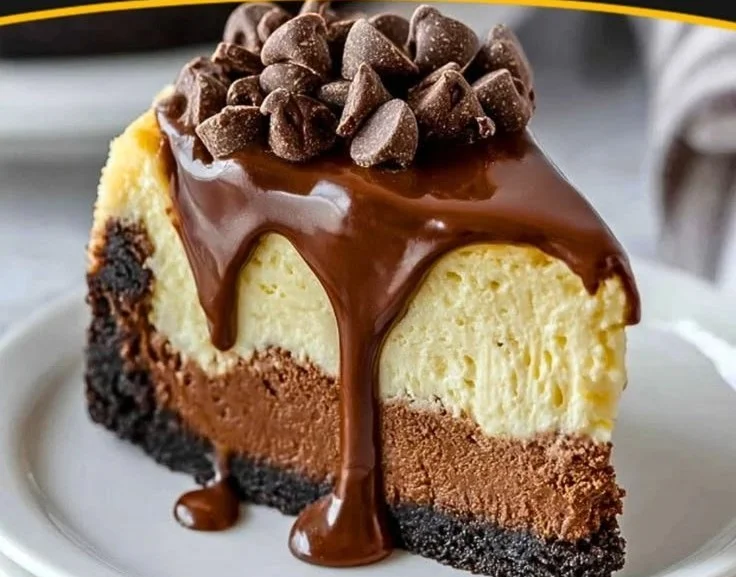
This Boston Cream Pie Cheesecake is everything you adore about the classic dessert, but with a creamy twist that makes it all the more indulgent. The chocolate cookie crumb crust provides a delightful crunch, perfectly balancing the velvety cheesecake filling. And let’s not forget the smooth chocolate ganache that drapes over the top, creating an irresistible finish. It’s a showstopper that is sure to impress at any dinner party or family gathering. Plus, it’s easy enough to make at home, so you can enjoy this slice of gourmet heaven whenever the craving strikes!
The Complete Cooking Journey
Creating this cheesecake is not just about following a recipe; it’s about the journey of flavors you’ll customize to your liking. Grab your ingredients, invite your loved ones into the kitchen, and let the magic unfold!
Ingredients:
- 1 ½ cups chocolate cookie crumbs
- ½ cup unsalted butter, melted
- 24 oz cream cheese, softened
- 1 cup granulated sugar
- 3 large eggs
- 1 tsp vanilla extract
- 1 cup heavy cream
- ½ cup semi-sweet chocolate chips
- 1 cup chocolate ganache
Method:
Step 1: Preheat the Oven
Preheat the oven to 325°F (160°C).
Step 2: Prepare the Crust
In a bowl, combine chocolate cookie crumbs and melted butter. Press the mixture firmly into the bottom of a springform pan.
Step 3: Mix the Cream Cheese Filling
In a large mixing bowl, beat the softened cream cheese and granulated sugar until smooth and creamy.
Step 4: Add the Eggs
Add the eggs one at a time to the cream cheese mixture, mixing well after each addition. Stir in the vanilla extract for a boost of flavor.
Step 5: Create the Chocolate Layer
Divide the batter into two bowls. Stir in the melted chocolate into one bowl to create the rich chocolate layer.
Step 6: Assemble the Cheesecake
Pour the vanilla cheesecake batter over the crust, then gently add the chocolate layer on top, spreading it evenly.
Step 7: Bake to Perfection
Bake the cheesecake for about 50-60 minutes, until it is set in the center. Resist the temptation to open the oven door too soon!
Step 8: Cool Down
Allow the cheesecake to cool at room temperature, then chill it in the refrigerator for at least 4 hours, or preferably overnight for the best results.
Step 9: Ganache Glory
Before serving, pour the decadent chocolate ganache over the top of the cheesecake and sprinkle with chocolate chips for that extra touch of indulgence.
Step 10: Slice and Serve!
Once ready, slice and serve this creamy delight to all the dessert lovers in your life. Enjoy every bite!
Serving Suggestions & Pairings
Pair your Boston Cream Pie Cheesecake with a dollop of whipped cream and fresh berries for a refreshing contrast. It also shines beside a cup of coffee or a glass of dessert wine, which perfectly complement its rich flavors.
Storage & Leftovers Guide
Store any leftovers in an airtight container in the refrigerator for up to 5 days. Alternatively, you can freeze slices for up to 2 months. Just make sure to wrap them well to prevent freezer burn!
Kitchen Wisdom & Success Tips
- Make sure your cream cheese is softened to room temperature for easier mixing.
- Allow the cheesecake to cool completely before chilling in the fridge to ensure the perfect texture.
- Don’t rush the chilling time; an overnight rest yields the creamiest, most flavorful cheesecake.
Flavor Variations & Adaptations
- For a salted caramel twist, drizzle some caramel sauce before adding the chocolate ganache.
- Add orange zest to the vanilla layer for a hint of citrus flavor.
- Use different flavored cookies (like Oreos) for the crust to personalize your cheesecake.
Reader Questions & Solutions
- What can I substitute for cream cheese? You can use mascarpone or a mixture of ricotta and sour cream for a lighter version.
- Can I make this cheesecake ahead of time? Absolutely! It tastes even better the next day, allowing the flavors to meld beautifully.
- What should I do if my cheesecake cracks? Avoid overbaking and let it cool gradually in the oven with the door ajar.
- Can I use a different kind of ganache? Yes! White chocolate ganache or flavored ganaches (like raspberry) can add a creative twist.
- How do I know when my cheesecake is done? The edges should be set, and the center should still have a slight jiggle when shaken gently.
Wrapping Up
Creating this Boston Cream Pie Cheesecake is not just about following a recipe—it’s about crafting a beautiful dessert that brings joy and satisfaction to those you love. So grab your ingredients, embrace the process, and let your inner baker shine! When it comes to whipping up this dreamy cheesecake, remember that every bite is a reason to celebrate. Happy baking!
PrintBoston Cream Pie Cheesecake

A delightful blend of creamy cheesecake and rich chocolate that transforms the classic Boston Cream Pie into a decadent cheesecake.
- Prep Time: 20 minutes
- Cook Time: 60 minutes
- Total Time: 360 minutes
- Yield: 10 servings 1x
- Category: Dessert
- Method: Baking
- Cuisine: American
- Diet: Vegetarian
Ingredients
- 1 ½ cups chocolate cookie crumbs
- ½ cup unsalted butter, melted
- 24 oz cream cheese, softened
- 1 cup granulated sugar
- 3 large eggs
- 1 tsp vanilla extract
- 1 cup heavy cream
- ½ cup semi-sweet chocolate chips
- 1 cup chocolate ganache
Instructions
- Preheat the oven to 325°F (160°C).
- Combine chocolate cookie crumbs and melted butter in a bowl and press the mixture into the bottom of a springform pan.
- Beat the softened cream cheese and granulated sugar until smooth and creamy.
- Add the eggs one at a time, mixing well after each addition, then stir in the vanilla extract.
- Divide the batter into two bowls; stir in melted chocolate into one bowl.
- Pour the vanilla cheesecake batter over the crust, then gently add the chocolate layer on top.
- Bake for about 50-60 minutes until set in the center.
- Cool at room temperature, then chill in the refrigerator for at least 4 hours.
- Pour chocolate ganache over the top before serving.
- Slice and serve to enjoy this creamy delight.
Notes
Pair with whipped cream and fresh berries. Store leftovers in an airtight container for up to 5 days or freeze for up to 2 months.
Nutrition
- Serving Size: 1 slice
- Calories: 450
- Sugar: 20g
- Sodium: 350mg
- Fat: 33g
- Saturated Fat: 18g
- Unsaturated Fat: 5g
- Trans Fat: 0g
- Carbohydrates: 34g
- Fiber: 1g
- Protein: 7g
- Cholesterol: 180mg