
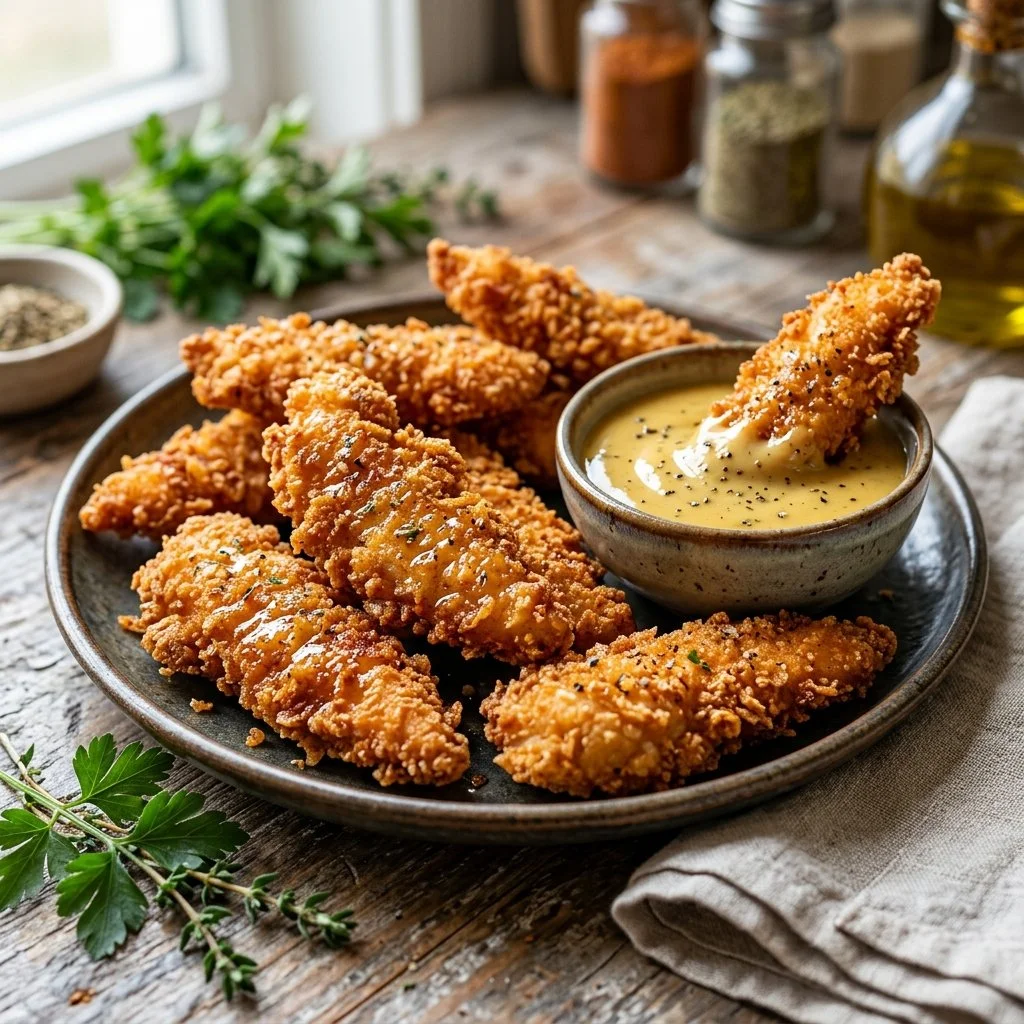
There’s something incredibly satisfying about biting into a crispy, golden-brown chicken tender. It evokes memories of childhood days, especially when paired with a tangy dipping sauce. These heavenly bites can take you back to summer picnics or family gatherings, where laughter filled the air and the aroma of fried goodness tantalized your senses. Today, I’m thrilled to share how you can recreate that nostalgia right in your own kitchen with a modern twist—Air Fryer Chicken Tenders. This recipe is not just about making a meal; it’s about bringing joy, comfort, and a little crunch into your life.
Recipe Timing
- Prep Duration: 10 minutes
- Active Cooking: 12 minutes
- Total Duration: 22 minutes
- Portion Size: Serves approximately 4
- Complexity: Simple
Nutritional Recipe
- Calories per portion: 280
- Protein: 25 grams
- Carbs: 20 grams
- Fats: 12 grams
- Fiber: 1 gram
- Sugars: 1 gram
- Sodium: 600 mg
Why You’ll Love This Air Fryer Chicken Tenders
You might be wondering what sets these air fryer chicken tenders apart from the traditional fried version. For one, they’re healthier! You get that irresistible crunch without the guilt of deep frying, thanks to the air fryer. Each bite delivers juicy, tender chicken enveloped in a savory, crispy crust. With a symphony of garlic, onion, and paprika flavors, these tenders are satisfying on their own or as part of a meal. Pair them with your favorite dipping sauce, and you’ll have a dish that pleases both kids and adults alike!
The Complete Cooking Journey
Imagine preheating your air fryer while you prepare the seasoned breadcrumbs. The aroma of garlic and paprika fills your kitchen, setting the stage for what’s to come. After a quick dip in the egg wash, each chicken tender is lovingly coated in the crumb mixture. As they cook, you can hear the lovely crunching sounds, and soon enough, the enticing scent of crispy chicken will waft through your home, beckoning everyone to the table.
Ingredients:
- 1 pound chicken tenders
- 1 cup breadcrumbs
- 1 teaspoon garlic powder
- 1 teaspoon onion powder
- 1/2 teaspoon paprika
- Salt and pepper to taste
- 1 egg
- 2 tablespoons olive oil
Method:
Step 1: Preheat Your Air Fryer
Preheat the air fryer to 400°F (200°C). This step ensures that your chicken tenders start cooking right away, getting that perfect crispy texture.
Step 2: Mix the Seasoned Breadcrumbs
In a bowl, combine breadcrumbs, garlic powder, onion powder, paprika, salt, and pepper. This fragrant mixture will be the star of your breading process, enhancing the flavor of the chicken.
Step 3: Beat the Egg
In another bowl, beat the egg until it’s well mixed. This will act as the binder to help the breadcrumbs adhere to the chicken.
Step 4: Dipping the Chicken Tenders
Dip each chicken tender into the egg, allowing any excess to drip off. This step is crucial for a good coating.
Step 5: Coat with Breadcrumb Mixture
Once dipped, coat each tender thoroughly with the breadcrumb mixture. Don’t be shy—pat the breadcrumbs onto the chicken to ensure they stick well.
Step 6: Prepare the Air Fryer Basket
Lightly spray the air fryer basket with olive oil. This helps prevent sticking and contributes to that luscious golden color.
Step 7: Arrange the Chicken Tenders
Place the chicken tenders in the air fryer basket in a single layer. Be sure to leave some space between each piece for even cooking.
Step 8: Cook to Perfection
Cook for 10-12 minutes, flipping halfway through, until the tenders are golden brown and fully cooked. The crispy exterior will give a lovely crunch when you bite into them.
Step 9: Serve with Dipping Sauce
Serve your delicious air fryer chicken tenders with your favorite dipping sauce—whether it’s honey mustard, ranch, or BBQ, the choice is yours!
Serving Suggestions & Pairings
These chicken tenders shine as an appetizer or can be included in a wholesome meal. Serve them alongside a fresh salad, crispy fries, or steamed veggies for a balanced dinner. They also make a fantastic addition to a game day spread.
Storage & Leftovers Guide
If you have any leftovers, store the chicken tenders in an airtight container in the refrigerator for up to 3 days. For the best texture, reheat them in the air fryer for a few minutes before serving. You can also freeze cooked tenders for up to 2 months—simply allow them to cool completely before placing them in a freezer bag.
Kitchen Wisdom & Success Tips
- Don’t Crowd the Basket: Overcrowding can lead to uneven cooking. If you have a lot of tenders, cook them in batches.
- Use Panko for Extra Crunch: If you want a crunchier texture, opt for panko breadcrumbs instead of regular breadcrumbs.
- Season to Taste: Feel free to adjust the seasoning in the breadcrumb mixture according to your preferences. A dash of cayenne pepper could add a nice kick!
Flavor Variations & Adaptations
- Spicy Kick: Add some cayenne pepper to your breadcrumb mixture for a spicy twist.
- Herb Infusion: Mix in some dried herbs like oregano or thyme for an herby flavor profile.
- Cheesy Goodness: Incorporate parmesan cheese into the breadcrumbs for an extra cheesy flavor.
Reader Questions & Solutions
-
Q: Can I use frozen chicken tenders?
A: Yes, but be sure to thaw them before cooking for even results. Adjust cooking time as needed. -
Q: What if I don’t have an air fryer?
A: You can bake them in the oven at 400°F (200°C) for about 20-25 minutes, flipping halfway through. -
Q: Can I make these tenders gluten-free?
A: Absolutely! Just substitute traditional breadcrumbs with gluten-free options. -
Q: How do I get my tenders to be more moist?
A: Brining the chicken in a saltwater solution prior to breading can help keep them juicy. -
Q: Can I make them in advance?
A: You can bread the chicken ahead of time and keep it in the fridge for a few hours before cooking.
Wrapping Up
There you have it—crispy, delicious Air Fryer Chicken Tenders that will quickly become a family favorite! They’re easy to make, delightfully tasty, and perfect for any occasion. Whether you’re cooking for a crowd or just treating yourself, these tenders are sure to hit the spot. I encourage you to roll up your sleeves, try this recipe, and share the joy of homemade chicken tenders with your loved ones. Happy cooking!
PrintAir Fryer Chicken Tenders

Crispy, golden-brown chicken tenders made in an air fryer for a healthier twist on a classic comfort food.
- Prep Time: 10 minutes
- Cook Time: 12 minutes
- Total Time: 22 minutes
- Yield: 4 servings 1x
- Category: Main Course
- Method: Air Frying
- Cuisine: American
- Diet: None
Ingredients
- 1 pound chicken tenders
- 1 cup breadcrumbs
- 1 teaspoon garlic powder
- 1 teaspoon onion powder
- 1/2 teaspoon paprika
- Salt and pepper to taste
- 1 egg
- 2 tablespoons olive oil
Instructions
- Preheat the air fryer to 400°F (200°C).
- Mix breadcrumbs, garlic powder, onion powder, paprika, salt, and pepper in a bowl.
- Beat the egg in another bowl until well mixed.
- Dip each chicken tender into the egg, allowing excess to drip off.
- Coat each tender with the breadcrumb mixture, patting it on to ensure it sticks.
- Prepare the air fryer basket by lightly spraying it with olive oil.
- Arrange the chicken tenders in a single layer in the air fryer basket.
- Cook for 10-12 minutes, flipping halfway through, until golden brown and fully cooked.
- Serve with your favorite dipping sauce.
Notes
Store leftovers in an airtight container in the refrigerator for up to 3 days. Reheat in the air fryer for best results.
Nutrition
- Serving Size: 1 serving
- Calories: 280
- Sugar: 1g
- Sodium: 600mg
- Fat: 12g
- Saturated Fat: 1.5g
- Unsaturated Fat: 10g
- Trans Fat: 0g
- Carbohydrates: 20g
- Fiber: 1g
- Protein: 25g
- Cholesterol: 70mg