
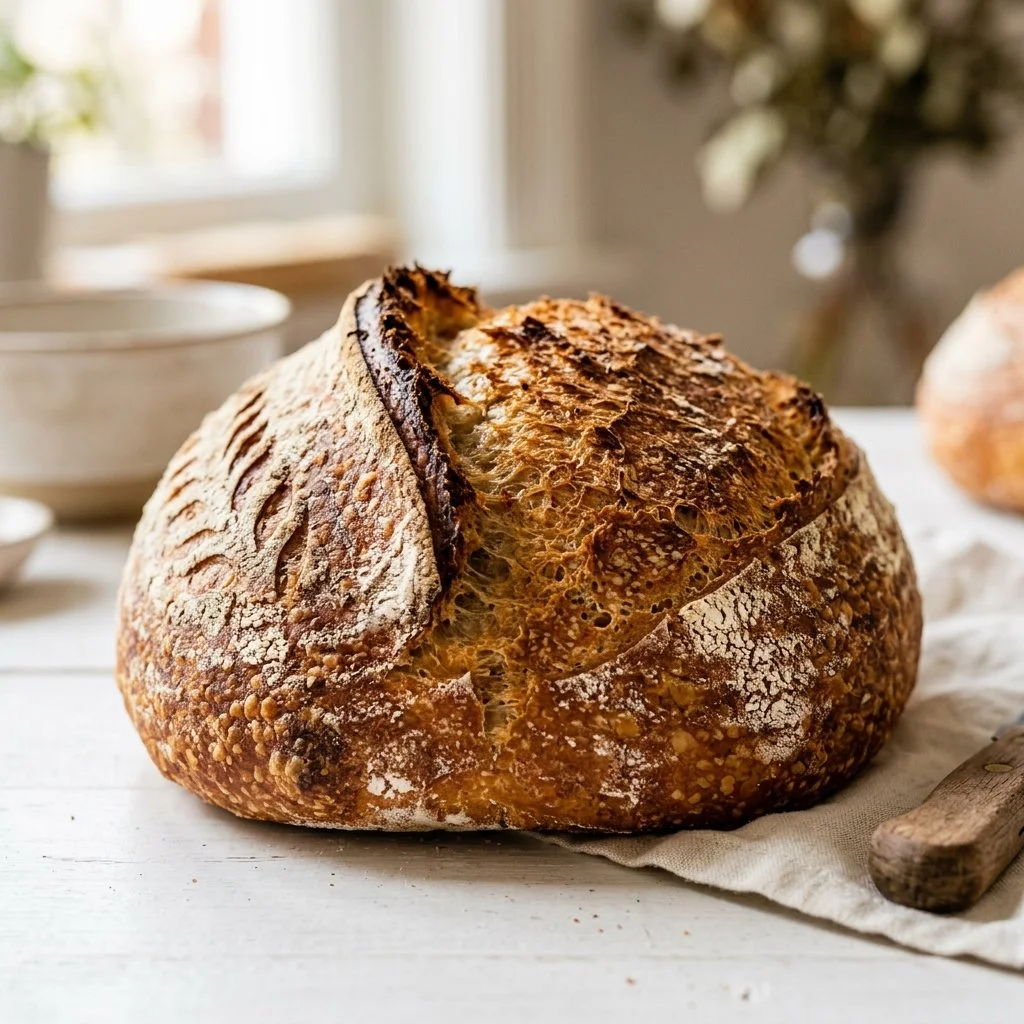
There’s something uniquely magical about baking your own bread at home. It’s an experience packed with patience, warmth, and the joy of anticipation. As the dough rises and fills your kitchen with the scent of fermentation, you are taken on a sensory journey that transports you back to simpler times. For me, baking sourdough bread is more than just cooking; it’s about creating a tangible connection with the past, savoring the process, and celebrating the art of slow food. The first slice of a freshly baked loaf, hot and crispy, accompanied by a spread of creamy butter—there’s truly nothing like it.
Recipe Timing
- Prep Duration: 30 minutes
- Active Cooking: 45-60 minutes
- Total Duration: Approximately 6-10 hours (including rising and proofing)
- Portion Size: Serves about 10 slices
- Complexity: Moderate
Nutritional Recipe
- Calories per portion: Approximately 165 kcal
- Protein: 5g
- Carbs: 32g
- Fats: 0.5g
- Fiber: 1g
- Sugars: 0.5g
- Sodium: 180mg
Why You’ll Love This Classic Sourdough Bread
This Classic Sourdough Bread is one that embodies rustic charm and rich flavor. The crust is deeply golden-brown and crackly, while the interior is soft and chewy with delightful air pockets that showcase the artistry of traditional bread-making. It’s perfect for holding up against your favorite spreads or sandwiches, and its flavorful tang from the sourdough starter makes it a perfect companion for soups and stews. Plus, homemade sourdough carries a natural probiotic quality that elevates your health aside from just satisfying your cravings!
The Complete Cooking Journey
Baking sourdough bread is not just about the end product; it’s a journey that unfolds over several hours, inviting you to engage with each stage of the process. From mixing the flour and water, which flirt with each other to form a sticky dough, to the incredible transformation during the baking that results in a loaf as beautiful as it is delicious—each moment deserves your attention and care.
Ingredients:
- 500g bread flour
- 350g water
- 100g sourdough starter
- 10g salt
Method:
Step 1: Mix the Flour and Water
In a large bowl, mix the bread flour and water until there are no dry spots. Let it rest for 30 minutes. This initial rest, known as autolyse, allows the flour to fully hydrate, setting the stage for gluten development.
Step 2: Incorporate the Sourdough Starter and Salt
Add the sourdough starter and salt to the rested dough. Mix everything until well combined. This ensures that all the ingredients are evenly distributed, allowing fermentation to work its magic.
Step 3: Knead the Dough
On a floured surface, knead the dough for about 10 minutes until it becomes smooth and elastic. This step builds the gluten structure, which is crucial for giving the bread its chewy texture.
Step 4: The First Rise
Place the dough in a lightly greased bowl, cover it, and let it rise at room temperature for 4-6 hours or until it has doubled in size. This is when the wild yeast works its magic, creating those beautiful bubbles in the dough.
Step 5: Pre-Shape the Dough
Once risen, gently pre-shape the dough into a ball and let it rest for 30 minutes. This helps relax the gluten, making it easier to shape the loaf later.
Step 6: Shape the Loaf
Shape the rested dough into your desired loaf shape, then transfer it to a proofing basket and cover. Allow it to proof for 2-4 hours at room temperature or overnight in the fridge for a deeper flavor profile.
Step 7: Preheat the Oven
About 30 minutes before baking, preheat your oven to 450°F (232°C) with a Dutch oven inside. This helps create a steamy environment for the bread, which is essential for a crusty exterior.
Step 8: Bake the Loaf
Carefully place the proofed loaf into the hot Dutch oven, cover it, and bake for 30 minutes. After that, remove the lid and bake for an additional 15-20 minutes until the loaf is golden brown and sounds hollow when tapped on the bottom.
Step 9: Cool and Slice
Once baked, carefully remove the bread from the oven and let it cool on a wire rack before slicing. This cooling period lets the interior finish setting and prevents a gummy texture.
Serving Suggestions & Pairings
Sourdough bread pairs wonderfully with a variety of toppings. Try it toasted with avocado and a sprinkle of sea salt, or slather it with homemade garlic herb butter for a simple treat. It also shines as the base for open-faced sandwiches or alongside a hearty bowl of soup. Serve it with a cheese platter for a delightful appetizer or as part of a rustic picnic spread.
Storage & Leftovers Guide
To keep your sourdough bread fresh, store it in a paper bag at room temperature for up to three days. If you need to keep it longer, slicing and freezing the bread is your best option—just pop it in the toaster for a quick reheat whenever you crave a slice!
Kitchen Wisdom & Success Tips
- Ensure your sourdough starter is active before using it; a strong starter will yield the best results.
- Don’t rush the fermentation process; flavors and texture develop beautifully with time.
- Use a kitchen scale for accurate measurement of ingredients, which is essential for consistent results.
- For added flavor, try incorporating herbs, seeds, or spices into the dough during mixing.
- Practice makes perfect! Every bake teaches you more about how to handle and shape your dough.
Flavor Variations & Adaptations
Feel free to play with flavors! Add whole grains for a nuttier taste, or mix in seeds like sesame or sunflower for extra crunch. For sweetness, throw in dried fruits like cranberries or raisins. Alternatively, infuse your dough with spices like cinnamon or cardamom for a delightful variation.
Reader Questions & Solutions
-
Why is my sourdough bread not rising?
Ensure your starter is active with bubbles and has been fed within the last few hours. If it’s too cold in your kitchen, find a warm spot to encourage rising. -
How can I tell when my bread is fully baked?
Tap the bottom of the loaf; if it sounds hollow, it’s done. You can also use a thermometer—aim for an internal temperature between 200°F-210°F (93°C-99°C). -
What should I do if my dough is sticky?
If your dough feels overly sticky while kneading, add a small amount of flour, but be careful; too much can alter the dough’s hydration and texture. -
Can I use all-purpose flour instead of bread flour?
Yes, all-purpose flour can be used, but the texture may be slightly different; bread flour contains more protein, which helps create a chewier bread. -
How can I improve my bread’s crust?
Baking with steam helps achieve a crispy crust. Placing an empty pan in the oven while it preheats, then adding water to it just before the bread goes in, can create that steam.
Wrapping Up
Baking your own Classic Sourdough Bread is indeed a labor of love, but every step is a celebration of tradition and craft. So, roll up your sleeves, embrace the process, and soon you’ll find yourself enjoying the fruits of your labor fresh from the oven. Next time you take a bite, let the warm essence of homemade bread transport you to a comforting place—where the heart of the home truly beats! Happy baking!
PrintClassic Sourdough Bread
Baking your own sourdough bread at home is a magical experience that connects you to the art of slow food.
- Prep Time: 30 minutes
- Cook Time: 60 minutes
- Total Time: 360 minutes
- Yield: 10 slices 1x
- Category: Bread
- Method: Baking
- Cuisine: Homemade
- Diet: Vegetarian
Ingredients
- 500g bread flour
- 350g water
- 100g sourdough starter
- 10g salt
Instructions
- Mix the bread flour and water until there are no dry spots. Let it rest for 30 minutes.
- Incorporate the sourdough starter and salt into the rested dough and mix until well combined.
- Knead the dough on a floured surface for about 10 minutes until smooth and elastic.
- Place the dough in a lightly greased bowl, cover it, and let it rise at room temperature for 4-6 hours.
- Gently pre-shape the dough into a ball and let it rest for 30 minutes.
- Shape the dough into your desired loaf shape and transfer it to a proofing basket.
- Preheat your oven to 450°F (232°C) about 30 minutes before baking.
- Carefully place the proofed loaf into the hot Dutch oven, cover it, and bake for 30 minutes.
- Remove the lid and bake for an additional 15-20 minutes until golden brown.
- Cool the bread on a wire rack before slicing.
Notes
Ensure your sourdough starter is active for the best results. Store bread in a paper bag for up to three days or freeze for longer storage.
Nutrition
- Serving Size: 1 slice
- Calories: 165
- Sugar: 0.5g
- Sodium: 180mg
- Fat: 0.5g
- Saturated Fat: 0g
- Unsaturated Fat: 0g
- Trans Fat: 0g
- Carbohydrates: 32g
- Fiber: 1g
- Protein: 5g
- Cholesterol: 0mg