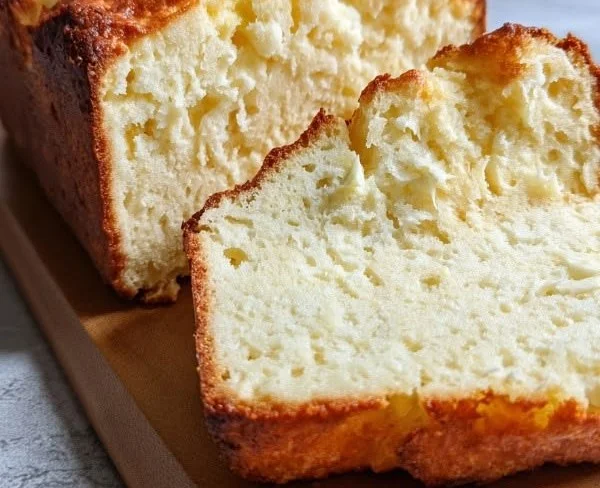
As I walked through the local farmers’ market last weekend, the scent of fresh herbs and baked bread filled the air, awakening my senses and sparking a sense of nostalgia. I was reminded of my childhood, where my mother would have freshly baked bread cooling on the counter, waiting to be devoured with a dollop of butter. However, in my ongoing culinary adventure to maintain a low-carb lifestyle for health reasons, I found myself on a quest for a delicious yet guilt-free bread option. Enter my latest creation: Yogurt Bread with a Gluten-Free Zero Carb option!
This recipe not only embraces the warmth and comfort of homemade bread but also offers a lightness thanks to tangy Greek yogurt and wholesome ingredients. So, let’s roll up our sleeves and dive into this delightful baking adventure!
Recipe Timing
- Prep Duration: 15 minutes
- Active Cooking: 50 minutes
- Total Duration: 1 hour 5 minutes
- Portion Size: Makes 1 loaf (approximately 8 servings)
- Complexity: Simple
Nutritional Recipe
- Calories per portion: Approximately 120 calories
- Protein: 6g per serving
- Carbs: 4g per serving (or nearly zero for the zero-carb option)
- Fats: 8g per serving
- Fiber: 2g per serving
- Sugars: 1g per serving
- Sodium: 150mg per serving
Why You’ll Love This Yogurt Bread Gluten-Free Zero Carb Option
What makes this bread truly remarkable is its versatility and flavor. It perfectly satisfies your craving for bread without the carbs that can weigh you down. The creamy Greek yogurt brings moisture, while the psyllium husk provides a delightful, chewy structure. Plus, whether you opt for the zero-carb twist or stick with a bit of coconut and almond flour, the satisfaction remains high. Serve it on its own, toasted with a pat of butter, or as the foundation for an open-faced sandwich—the possibilities are endless!
The Complete Cooking Journey
Let’s embark on this baking journey together. The steps are easy, and I promise the aroma wafting through your kitchen will be worth every minute!
Ingredients:
For the main loaf:
- 1 cup (240 g) full-fat Greek yogurt, unsweetened (or strained plain yogurt)
- 4 large eggs, room temperature
- 2 tbsp olive oil or melted butter (plus extra for greasing the pan)
- 1 cup (100 g) fine almond flour
- 1/3 cup (35 g) coconut flour
- 3 tbsp ground psyllium husk (not whole husks; use powder)
- 2 tsp gluten-free baking powder (aluminum-free)
- 1/2 tsp baking soda
- 1/2 tsp fine sea salt
- 1–2 tsp sweetener of choice, optional (erythritol, allulose, or monk fruit if you want low-carb but slightly sweet)
- 2–4 tbsp water or unsweetened almond milk, as needed to adjust consistency
For the zero-carb-focused option (swap section, optional):
- Replace almond flour with 1 cup (100 g) extra-fine defatted almond flour or a protein-rich nut flour blend (near-zero net carbs)
- Increase psyllium husk powder to 4 tbsp for extra structure
- Reduce or omit coconut flour if you want the lowest carbs possible; if omitting, add 1–2 extra tbsp psyllium and 1 extra egg if needed for structure
Optional flavor add-ins:
- 1 tsp apple cider vinegar or lemon juice (helps rise and flavor)
- 1 tsp garlic powder + 1 dried herb (oregano, thyme, rosemary) for a savory loaf
- 2 tbsp grated Parmesan or other hard cheese (still very low carb)
- 1–2 tbsp sesame seeds, sunflower seeds, or pumpkin seeds for topping
Method:
Step 1: Prepare the Pan
Preheat your oven to 350°F (175°C), conventional (not fan-forced if possible). Grease an 8.5 x 4.5 inch (21 x 11 cm) or 9 x 5 inch (23 x 13 cm) loaf pan with butter, oil, or nonstick spray. For easiest removal, line the bottom and long sides with a strip of parchment paper, allowing for some overhang as “handles”.
Step 2: Mix the Wet Ingredients
In a medium mixing bowl, add the yogurt, eggs, and olive oil or melted butter. Whisk until completely smooth, leaving no streaks of egg remaining. If using, whisk in the apple cider vinegar or lemon juice at this point.
Step 3: Combine the Dry Ingredients
In a separate large bowl, add almond flour, coconut flour, ground psyllium husk, baking powder, baking soda, salt, and sweetener if using. Whisk thoroughly to break up any clumps and ensure the baking powder and psyllium are evenly distributed. Ensure there are no visible lumps of coconut flour or psyllium, as these can cause gummy pockets.
Step 4: Bring the Batter Together
Pour the wet mixture into the bowl with the dry ingredients. Using a spatula or wooden spoon, mix until just combined. The batter will start out loose and thicken quickly as the psyllium absorbs the moisture. After about 30–60 seconds of mixing, assess the consistency: it should be thick but spreadable, similar to a dense muffin batter or soft dough. If too thick and crumbly, add 1 tbsp of water or almond milk at a time until it holds together well. If too runny, let it sit for 2–3 minutes to thicken.
Step 5: Adjust for the Zero-Carb Option
For those using defatted almond flour and extra psyllium for a near-zero carb loaf, your batter may be slightly more absorbent. Add an extra 1–2 tbsp water or almond milk as needed to achieve a thick, spreadable batter. If it seems overly stiff, mix in one extra egg for moisture and structure. Be careful not to over-mix; once everything is mixed, stop stirring.
Step 6: Add Flavorings (Optional)
Gently fold in any herbs, garlic powder, grated cheese, or seeds if using. Again, avoid overworking the batter to keep the loaf from becoming denser than necessary.
Step 7: Fill the Pan
Transfer the batter to your prepared loaf pan. Use a spatula to press it gently into the corners, eliminating air pockets. Smooth the top, mounding it very slightly in the center for a nice loaf shape. If desired, sprinkle seeds or a bit of cheese on top for extra texture.
Step 8: Bake the Bread
Place the loaf pan on the middle rack of your preheated oven. Bake for 40–50 minutes, checking after 35 minutes. The top should be golden brown and feel firm when gently pressed. A toothpick inserted into the center should come out clean or with a few moist crumbs but no wet batter. If the top browns too quickly while the center is soft, loosely tent the loaf with foil and continue baking.
Step 9: Cool the Loaf Properly
Once baked, remove the pan from the oven and set it on a cooling rack. Let the bread cool in the pan for at least 15–20 minutes to set its structure. Carefully lift the loaf using the parchment paper handles and place it directly on the cooling rack. Allow it to cool completely (1–2 hours) before slicing to avoid a gummy interior.
Step 10: Slice and Serve
Use a sharp serrated knife to slice the loaf. For sandwiches, cut into medium-thick slices; for toast or snack-size portions, you can cut thinner slices. Serve plain, toasted with butter, topped with avocado, or as a base for open-faced sandwiches or alongside soups and salads.
Serving Suggestions & Pairings
This yogurt bread is a fantastic companion for a cozy soup, a fresh salad, or simply a spread topped with your favorite cheese or hummus. Add an herbal butter on the side for a gourmet touch, or layer it with sliced turkey and avocado for a deliciously satisfying lunch.
Storage & Leftovers Guide
Once fully cooled, store slices in an airtight container in the refrigerator for up to 5–6 days. For longer storage, wrap slices individually and freeze for up to 2–3 months. You can toast or warm frozen slices directly from the freezer in a toaster or oven, making it perfect for quick meals!
Kitchen Wisdom & Success Tips
- Ingredient Quality: Always choose high-quality ingredients for the best flavor and texture.
- Check Oven Temperature: Ovens can vary in temperature; consider using an oven thermometer for accuracy.
- Experiment with Flavors: Don’t hesitate to experiment with seasonal herbs or spices to give your bread a unique twist!
Flavor Variations & Adaptations
Try adding different cheeses for a cheesy bread experience, or swap out the coconut flour for additional nut flour to adjust the flavor base. You could even create a sweet version with cinnamon and nuts for breakfast!
Reader Questions & Solutions
- Why is my bread gummy? Ensure you allow the bread to cool completely before slicing. Slicing too soon can result in a gummy texture.
- How do I make it fluffier? Ensure your baking powder is fresh and properly mixed through to promote even rising.
- Can I use other types of yogurt? Absolutely, just make sure it’s unsweetened to keep your bread low-carb.
- Is there a substitute for psyllium husk? Ground flaxseed can work, but it won’t give the same texture.
- How should I store the bread? Cool it completely before storing in an airtight container in the fridge or freezer.
Wrapping Up
Baking this Yogurt Bread is not just a method to create a gluten-free, low-carb loaf; it’s a delightful experience that can bring comfort and joy to your meals. This bread embodies the warmth of family, the satisfaction of cooking, and the thrill of nourishment. So, gather your ingredients, enjoy the process, and embrace the deliciousness that awaits. Happy baking, and may your kitchen be filled with love and wonderful aromas!
PrintYogurt Bread with Gluten-Free Zero Carb Option
A delicious, guilt-free yogurt bread that offers a low-carb alternative for those looking to enjoy homemade bread without the carbs.
- Prep Time: 15 minutes
- Cook Time: 50 minutes
- Total Time: 65 minutes
- Yield: 8 servings 1x
- Category: Bread
- Method: Baking
- Cuisine: American
- Diet: Gluten-Free
Ingredients
- 1 cup (240 g) full-fat Greek yogurt, unsweetened
- 4 large eggs, room temperature
- 2 tbsp olive oil or melted butter (plus extra for greasing the pan)
- 1 cup (100 g) fine almond flour
- 1/3 cup (35 g) coconut flour
- 3 tbsp ground psyllium husk
- 2 tsp gluten-free baking powder
- 1/2 tsp baking soda
- 1/2 tsp fine sea salt
- 1–2 tsp sweetener of choice, optional
- 2–4 tbsp water or unsweetened almond milk, as needed
- 1 tsp apple cider vinegar or lemon juice, optional
- 1 tsp garlic powder + 1 dried herb, optional
- 2 tbsp grated Parmesan or other hard cheese, optional
- 1–2 tbsp sesame seeds, sunflower seeds, or pumpkin seeds for topping
Instructions
- Preheat your oven to 350°F (175°C) and grease a loaf pan.
- In a medium bowl, whisk yogurt, eggs, and oil or butter until smooth.
- In a separate bowl, combine all dry ingredients and mix thoroughly.
- Pour the wet mixture into the dry and mix until just combined.
- If making the zero-carb option, adjust the batter as needed for consistency.
- Gently fold in any optional flavorings.
- Transfer the batter to the prepared loaf pan and smooth the top.
- Bake for 40–50 minutes, checking after 35 minutes for doneness.
- Remove from the oven and cool in the pan for 15–20 minutes before transferring to a cooling rack.
- Slice the loaf once fully cooled and serve as desired.
Notes
Ensure to cool the bread completely to avoid a gummy texture. This bread pairs well with soups and salads.
Nutrition
- Serving Size: 1 slice
- Calories: 120
- Sugar: 1g
- Sodium: 150mg
- Fat: 8g
- Saturated Fat: 3g
- Unsaturated Fat: 5g
- Trans Fat: 0g
- Carbohydrates: 4g
- Fiber: 2g
- Protein: 6g
- Cholesterol: 150mg